
We are excited to announce an all-new agentic search user experience available in OpenSearch 3.4. This interface in OpenSearch Dashboards provides a streamlined way to configure agents, test them using natural language queries, and export configurations for downstream application integration.
What is agentic search?
Agentic search transforms the way you interact with data by letting you use natural language queries instead of writing complex search syntax. An intelligent agent interprets your question, automatically plans the search, and returns relevant results, providing complete transparency into its decision-making process. For more information, read our previous blog post. For a detailed overview of agentic search capabilities and architecture, see the agentic search documentation.
Using agentic search in OpenSearch Dashboards
To access agentic search in OpenSearch Dashboards, go to OpenSearch Dashboards > OpenSearch Plugins > AI Search Flows and create a new agentic search workflow. The interface has two main sections: agent configuration options on the left and search execution capabilities on the right. For detailed information about the interface components, agent types, available tools, and configuration options, see Configuring agentic search.
Examples
Let’s explore practical use cases that demonstrate how agentic search transforms complex search scenarios into intuitive, natural language interactions. The examples in the next sections use the following preconfigured resources:
- A deployed Amazon Bedrock Claude 4.5 agent. For information about deploying this model in your environment, and to view other suggested models compatible with agentic search, see the agentic search documentation.
- An index named
demo_amazon_fashion. This index was created using the MIT-licensed Fashion Products Images Dataset with added synthetic values for prices and ratings. Alternatively, you can use any index containing product data. - A connector to a Model Context Protocol (MCP) server containing order history based on customer IDs. For information about connecting to external MCP servers, see the MCP connector documentation.
Example 1: E-commerce conversational search
Conversational agents enable you to ask questions in natural language and refine your search by asking follow-up questions. The agent maintains context across the conversation in order to progressively narrow results and return the most relevant results. Let’s build an application that demonstrates this capability.
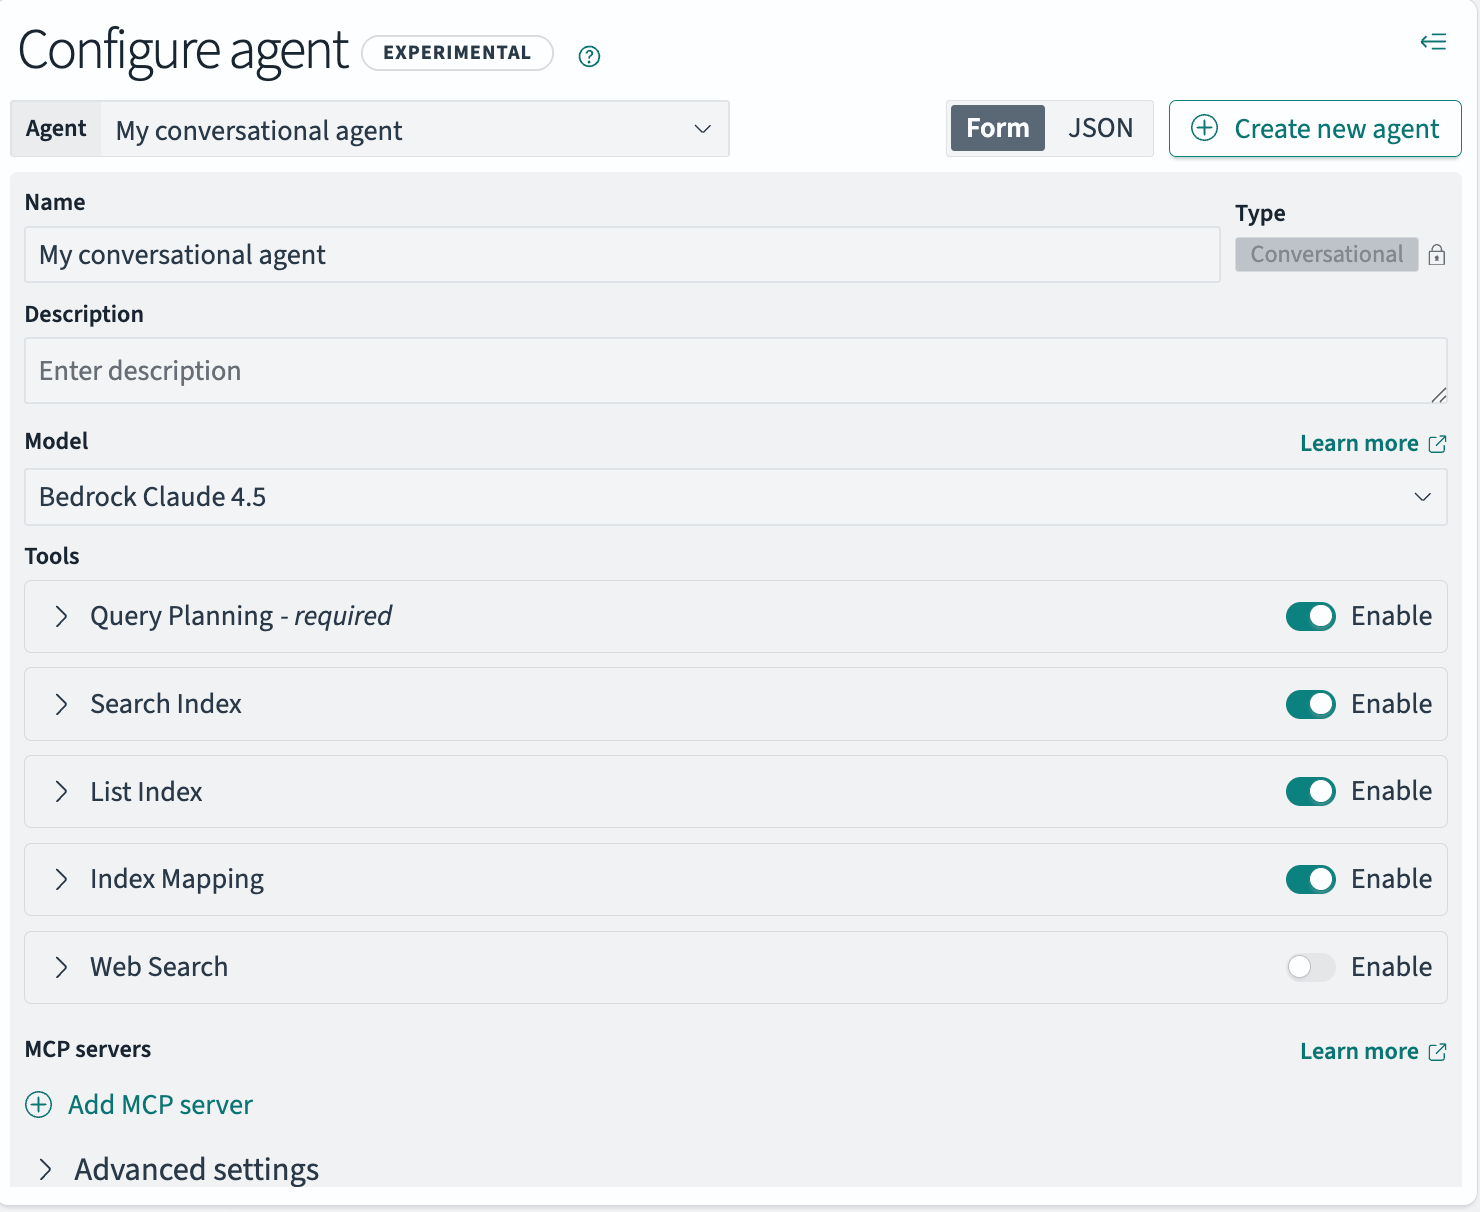
Step 1: Create an agent
Create a conversational agent with various index-related tools that enable the agent to understand your data structure, plan effective queries, and retrieve relevant results:
- Select Create agent.
- Provide a name:
My conversational agent. - Select the model:
Bedrock Claude 4.5. - Enable the following tools: Query Planning, Search Index, List Index, and Index Mapping.
- Select Create.
The following image shows the completed agent configuration form.
 Step 2: Run agentic searches
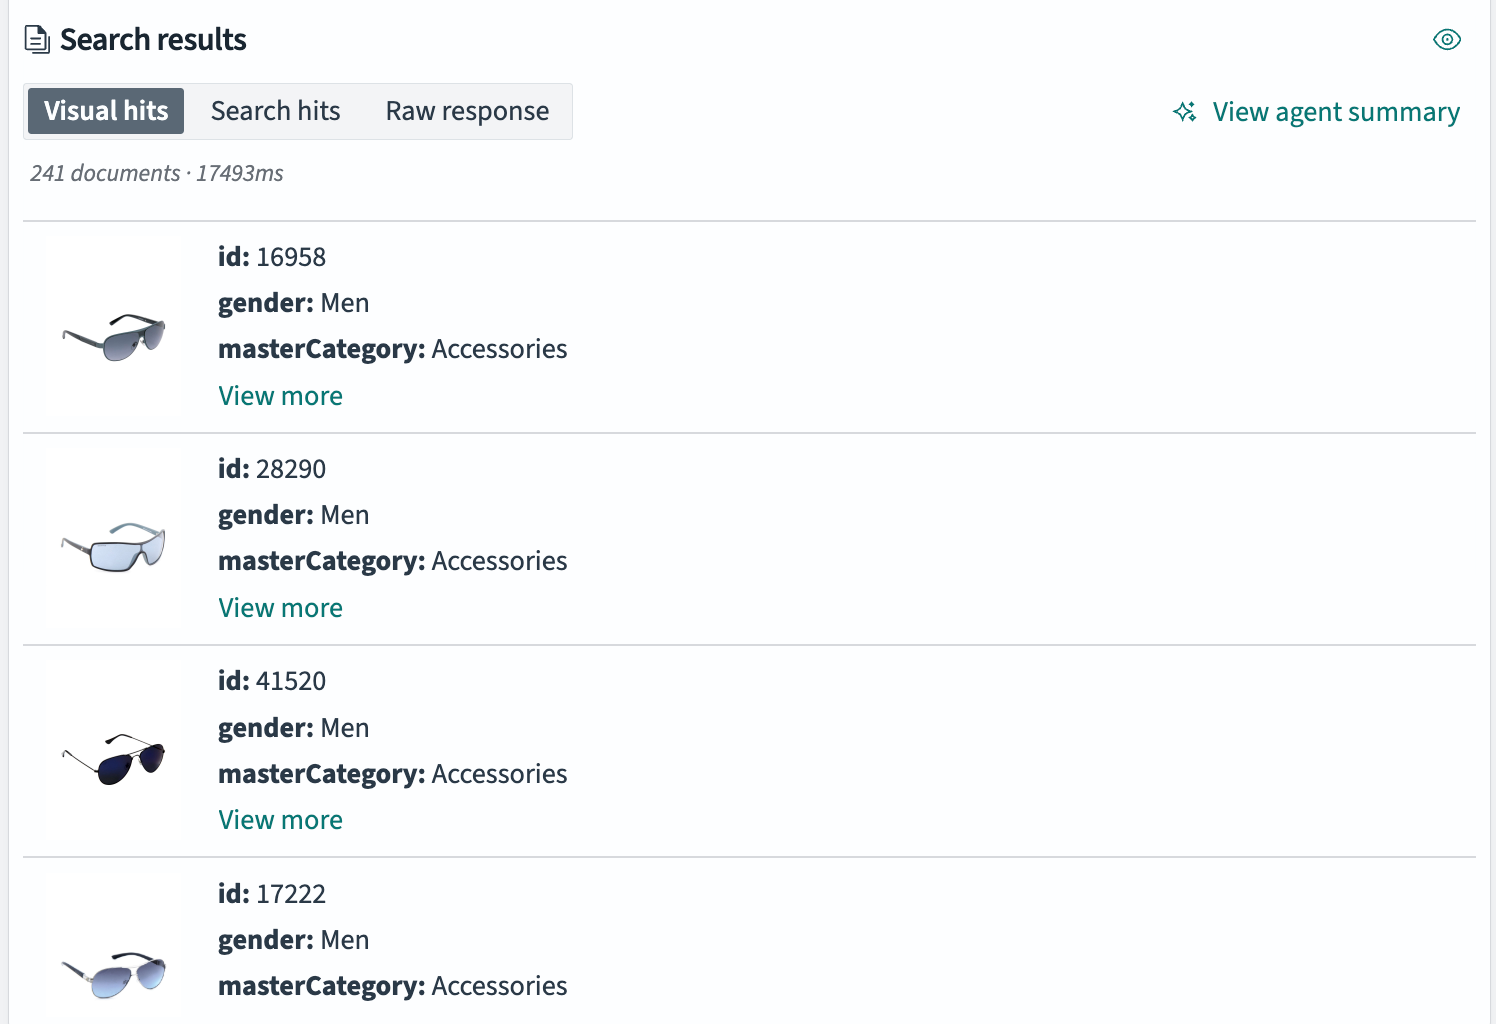
Now test the agent:
- Select the
demo_amazon_fashionindex. - Enter a search query, for example,
Blue shades for my dad. - Select Search.
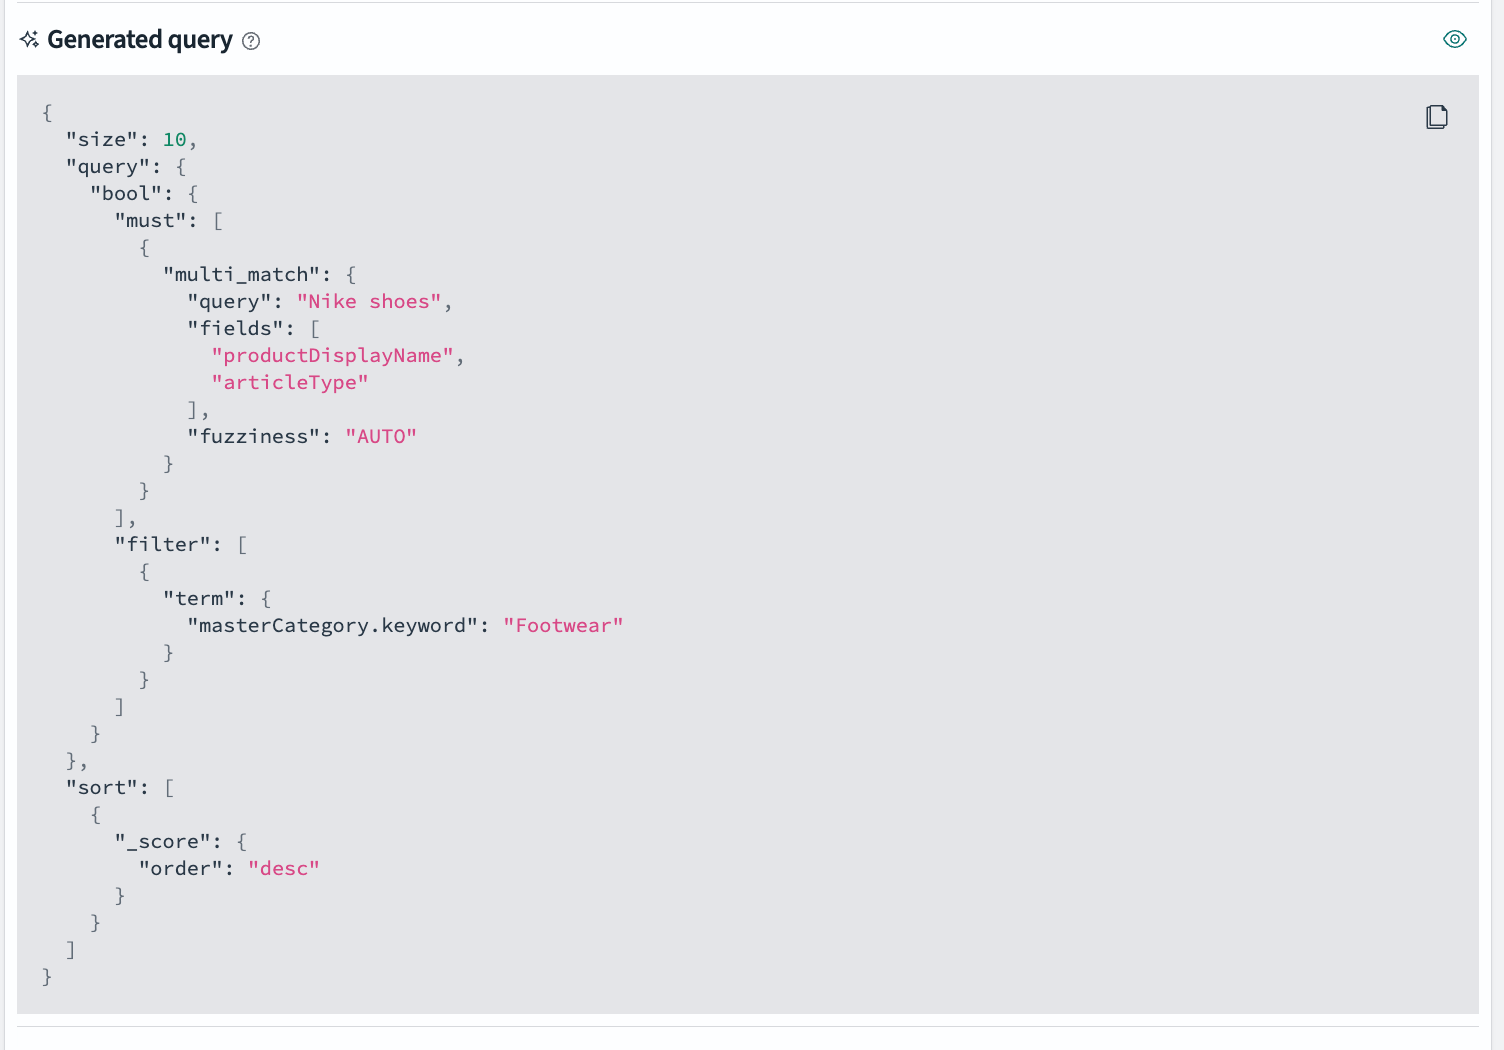
The agent generates the query domain-specific language (DSL) and returns the search results. The generated DSL query is shown in the following image.

The following image displays the corresponding search results. All results are men’s blue sunglasses, demonstrating accurate query interpretation.
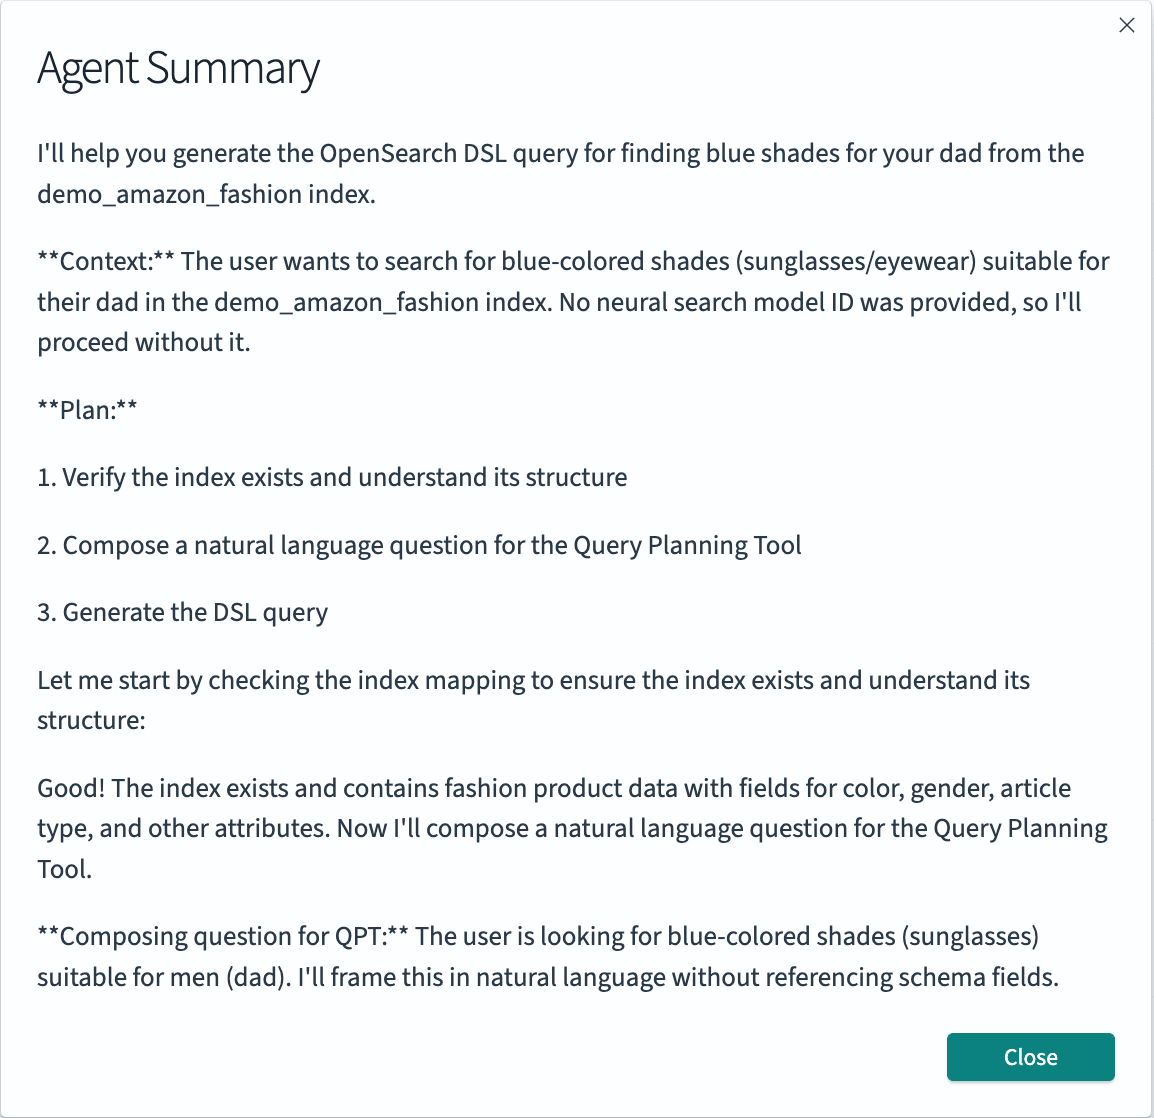
To understand the agent’s decision-making process, review the agent summary shown in the following image.
Now ask a follow-up question to refine your search:
- At the top, next to Query, select Continue conversation.
- Update the query to
Do you have any black ones from Ray-Ban?. - Select Search.
The agent maintains context from your original query while applying new constraints. The results now contain men’s black sunglasses specifically from Ray-Ban. The following image shows the refined search results, where you can select View more to view details for a search result.

If you run additional queries, the agent continuously references and updates the conversational history in order to maintain context. To remove the history and start a new conversation, select Clear conversation.
Step 3: Tune your agent
To optimize performance and result quality, you can fine-tune your agents and iteratively test different configurations.
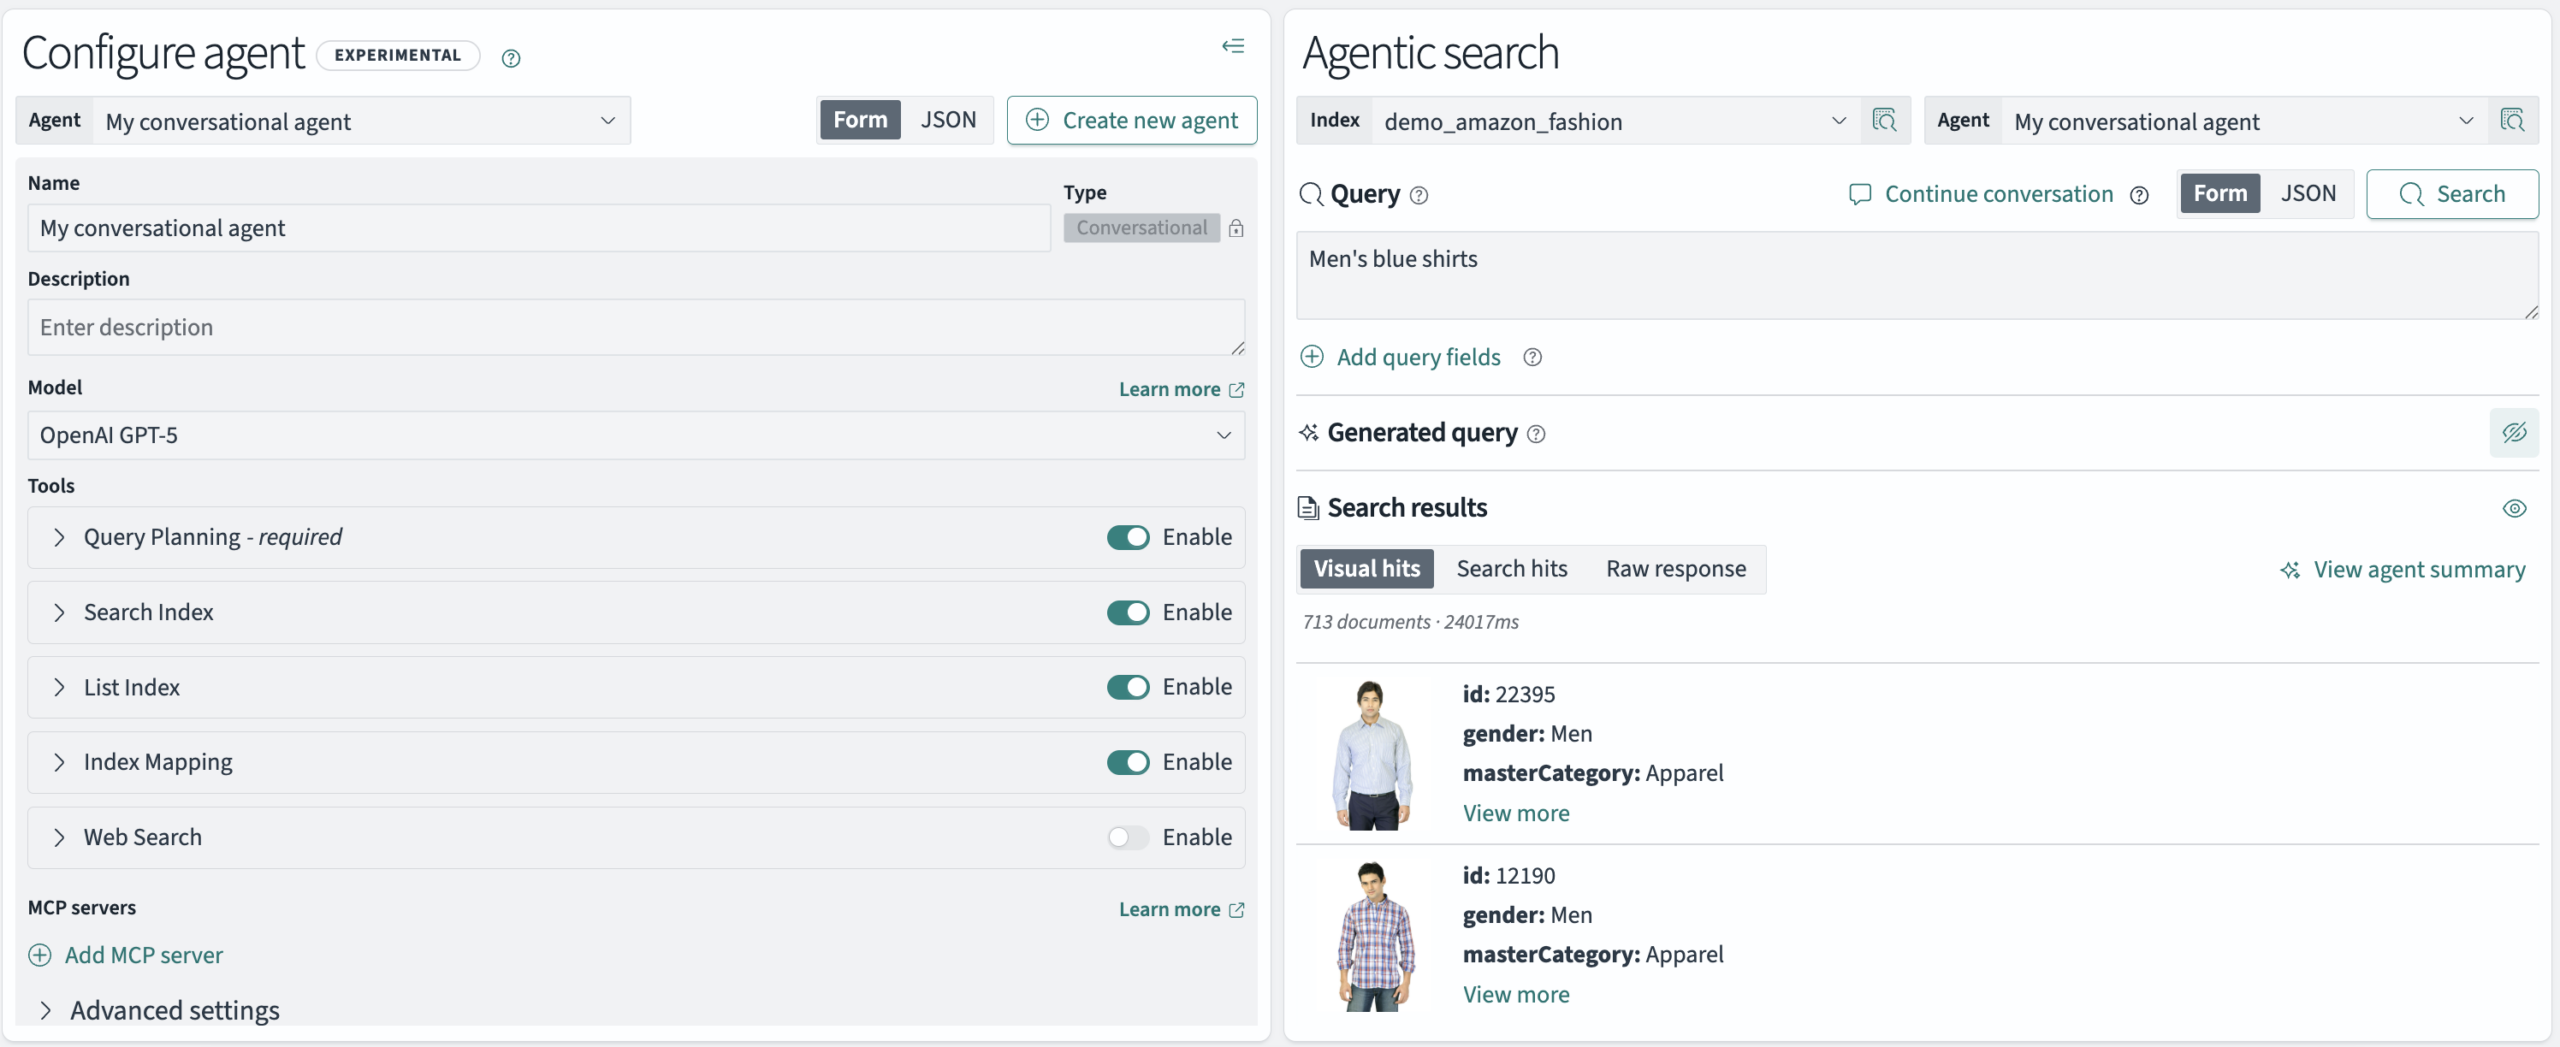
First, try swapping out the model for the latest one from OpenAI: GPT-5. This model offers enhanced reasoning capabilities and improved understanding of complex, multifaceted queries. After you deploy the model, perform the following steps:
- Under Configure Agent, select the Model dropdown.
- Select
OpenAI GPT-5. - Select Update agent.
- Under Agentic Search, select Search to run a new search using the updated agent and evaluate its performance.
The results returned after running the query Men's blue shirts using the new model are shown in the following image.
Next, try updating the model’s available tools. To enhance the agent’s flexibility and enable access to real-time information, enable the Web Search tool:
- Under Configure Agent > Tools > Web Search, select Enable. The tool form is expanded automatically.
- Under Engine, enter
duckduckgo—this is the simplest option and doesn’t require additional permissions or configuration. - Select Update agent.
- Under Agentic Search, select Search to run a new search using the updated agent. The agent can now address questions that require information beyond the scope of your indexed dataset.
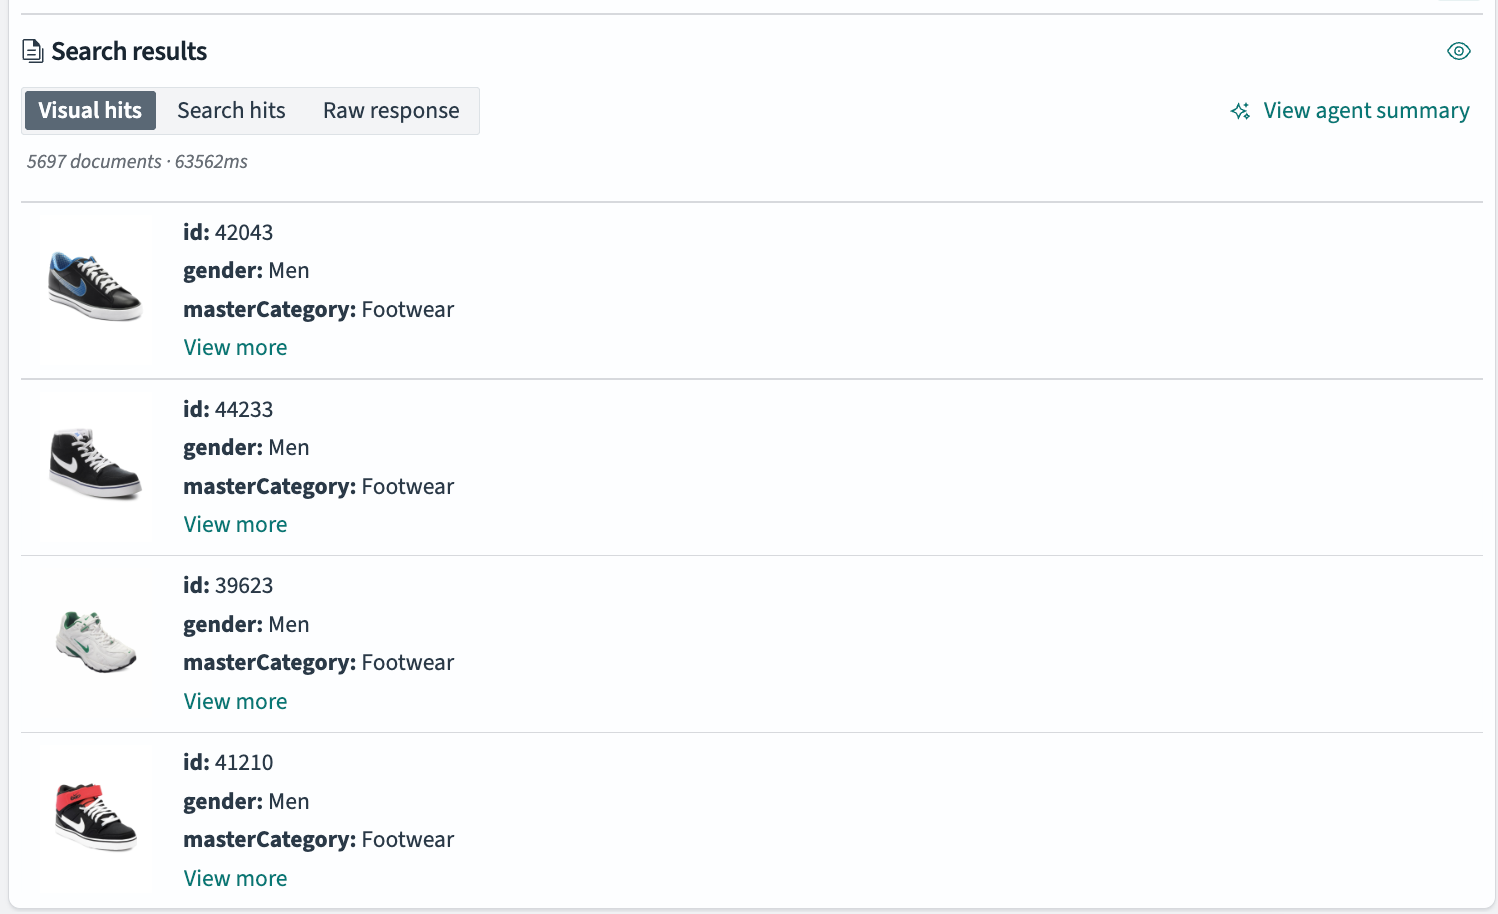
Now try a new search query that requires fetching external information and evaluate the results. Enter the query Shoes from the brand Serena Williams wears and select Search. The generated query filters specifically for the brand Nike, as shown in the following image.
The following image shows the query results.
The agent first searched the web to identify the shoe brand associated with Serena Williams, Nike, and then incorporated it into the generated query, ultimately returning Nike shoes, as shown in the agent summary in the following image.

Next, try integrating with the MCP server to let the agent view your order history for a more customized, personalized search experience. This server has a tool simple_get_order_history that you can use to return your order history details:
- Under Configure Agent > MCP Servers, select Add MCP server.
- From the MCP Server dropdown, select
Customer Order History MCP Server. - Under Tool filters, enter
simple_get_order_historyto restrict the agent’s access so that only this tool from the MCP server is available. This tool does not take any parameters and returns the default order history. - Select Update agent.
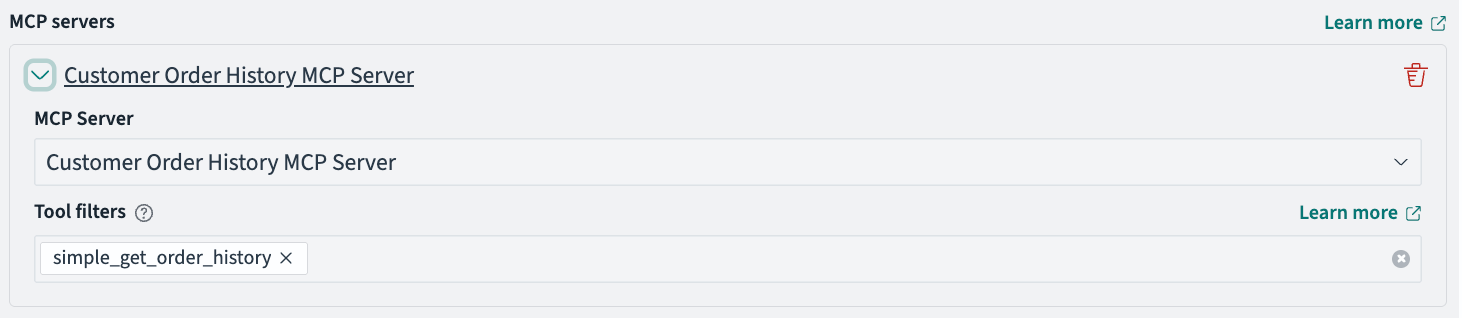
The following image shows the MCP server configuration.
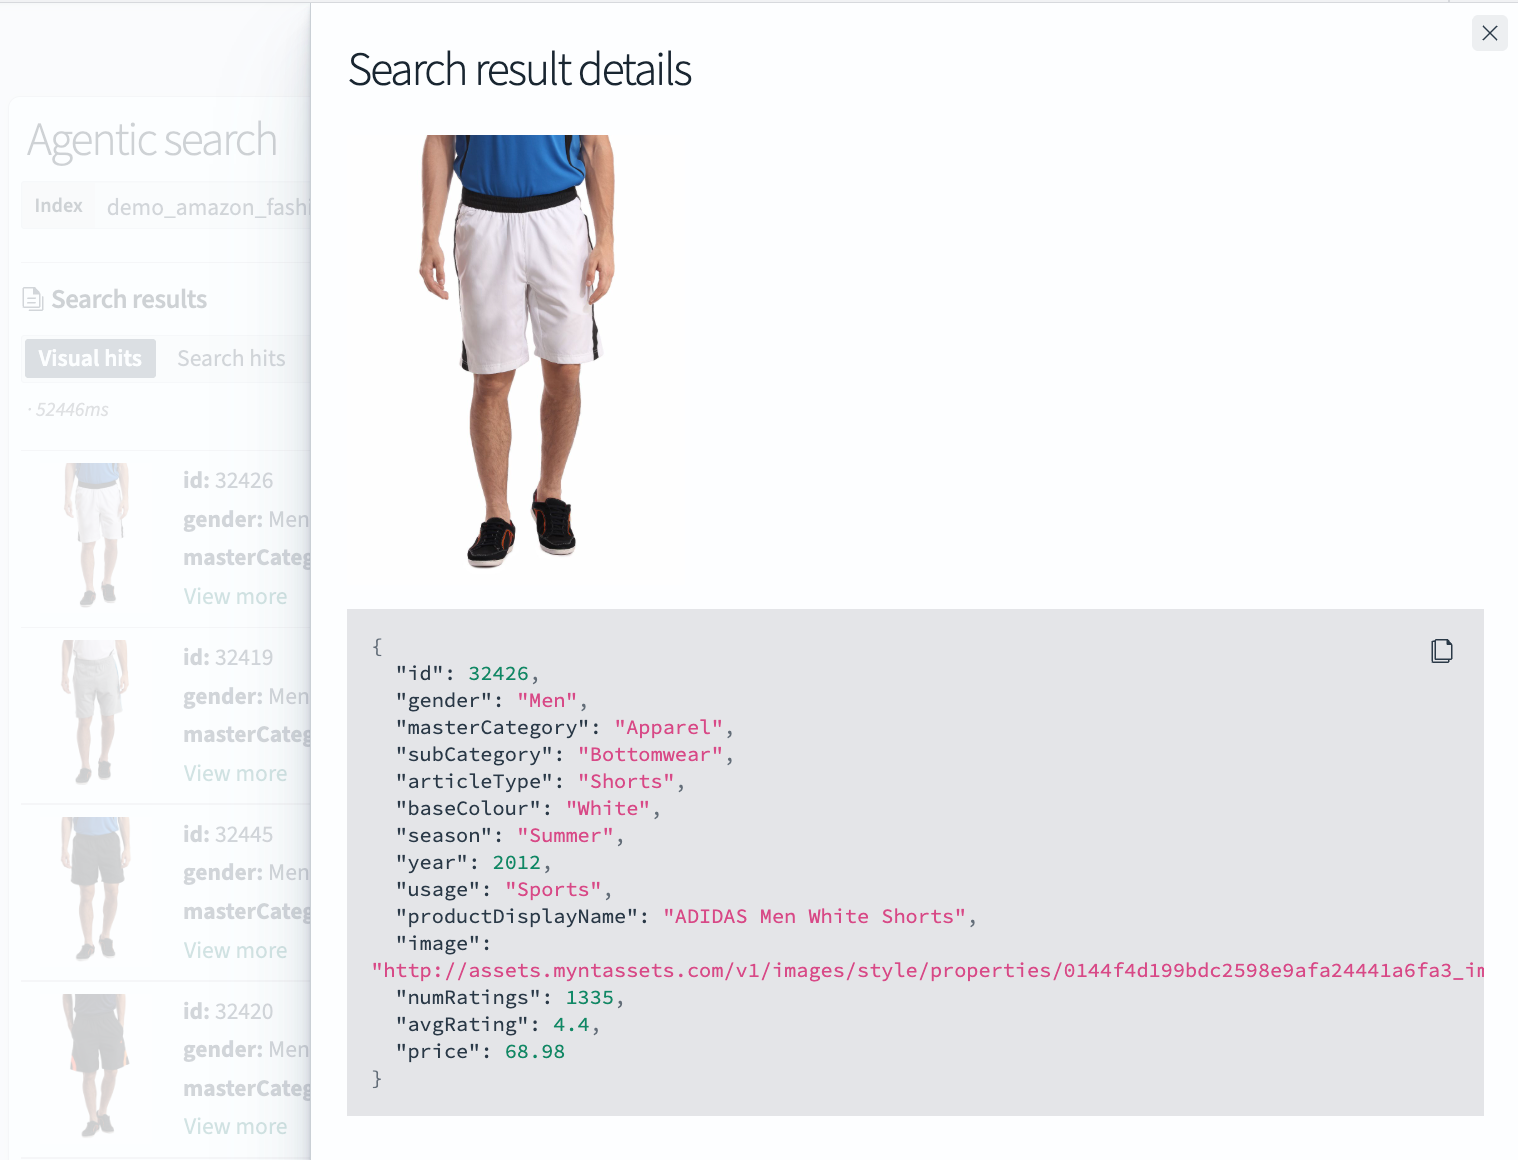
Now try searching for athletic shorts, using the order history to find similar products and brands. Update the query to Athletic shorts similar to my order history. The generated query is displayed in the following image.
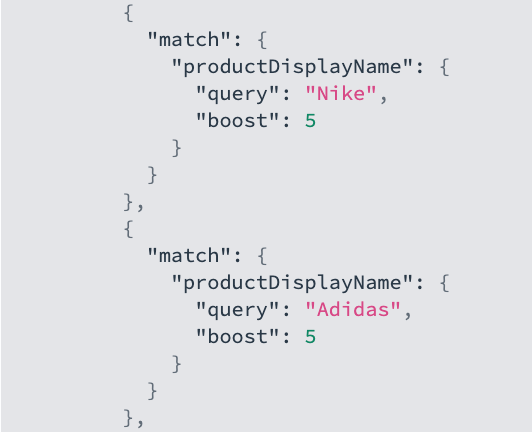
The following image shows the results, which include athletic shorts from Adidas and Nike.
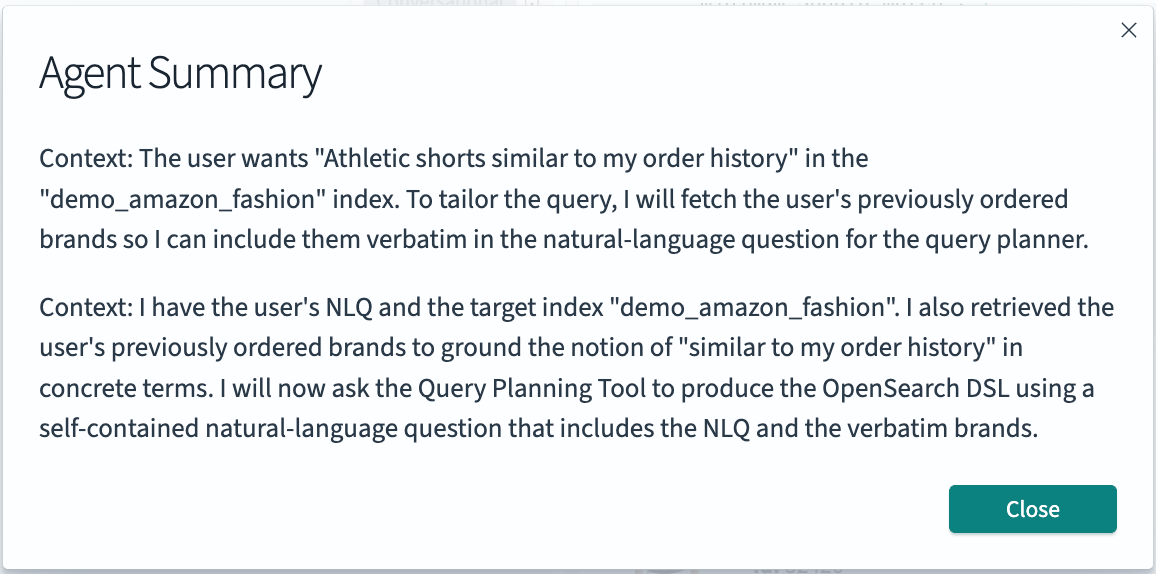
The following image shows the agent summary that demonstrates how the agent determined that the Nike and Adidas brands were present in the order history and applied the corresponding brand filters in the DSL query.
Step 4: Exporting your configuration
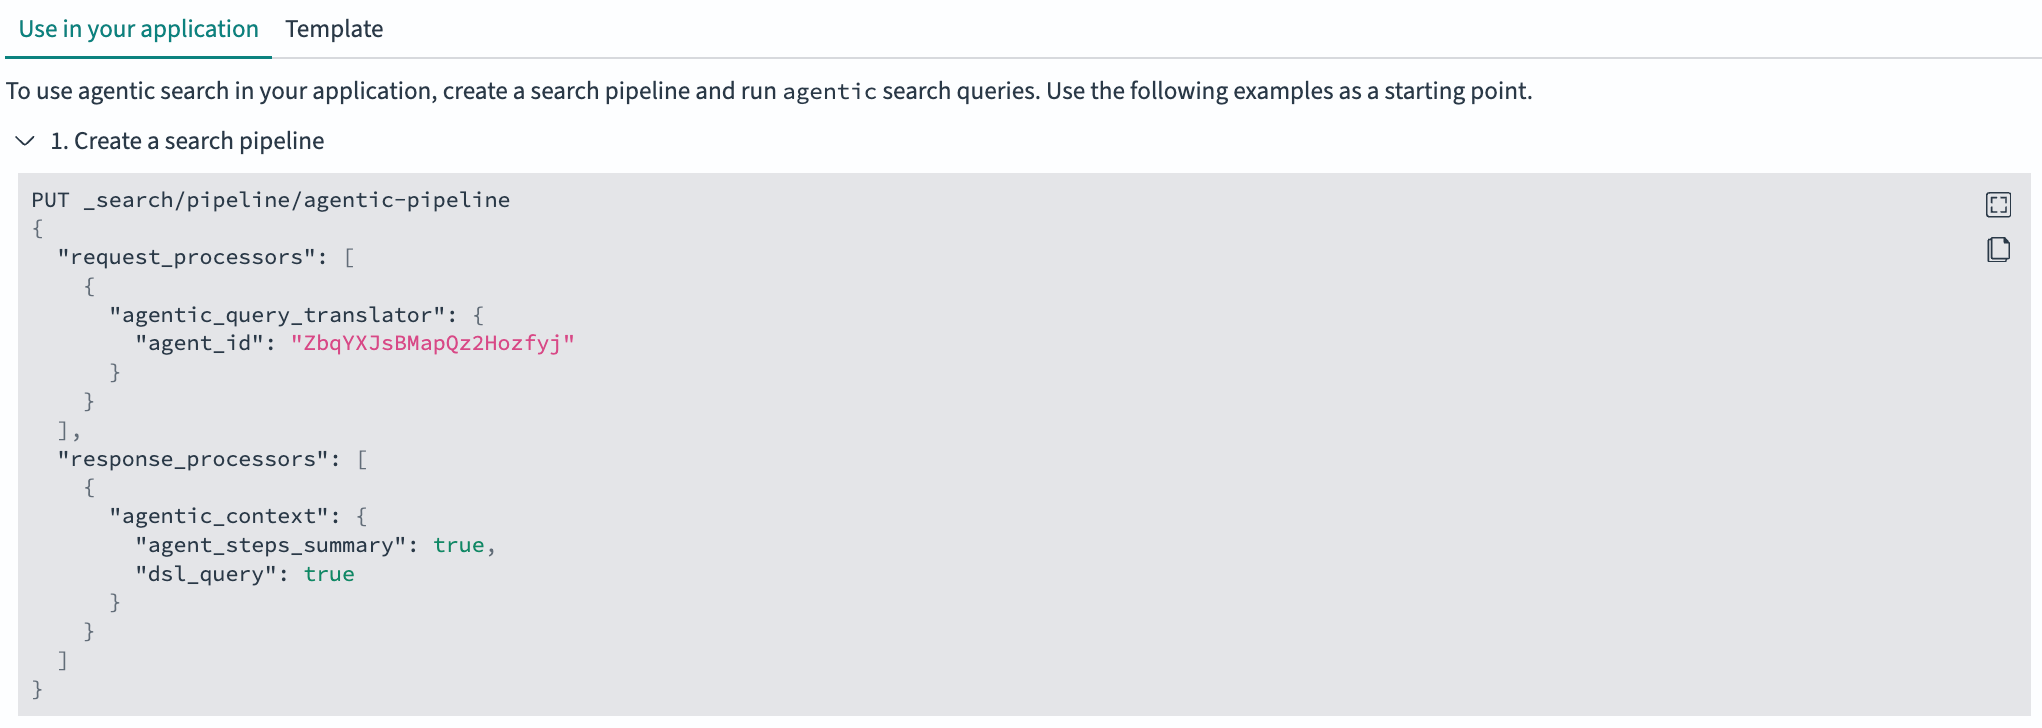
Once you’ve completed your testing and are ready to integrate your configuration into your downstream application, select Export in the top-right corner. This view provides detailed information about the underlying search pipelines that power agentic search and shows how you can integrate them into a new or existing system. The pipeline configuration details are shown in the following image.
Example query formats for integration are displayed in the following image.

Example 2: Fast product filtering
Flow agents provide fast, single-query search capabilities, performing significantly faster than conversational agents when multi-turn conversations or complex reasoning are not required. Let’s build an application that uses this efficiency.
Step 1: Create an agent
Create a flow agent:
- Select Create agent.
- Enter a name:
My flow agent. - Change the agent type to Flow.
- Under the Query Planning tool, select
Bedrock Claude 4.5. - Select Create.
The following image shows the flow agent configuration form.

Step 2: Run agentic searches
Test the agent by running a direct product search:
- Select the
demo_amazon_fashionindex. - Enter a search query, for example,
Women's running shoes under $100. - Select Search.
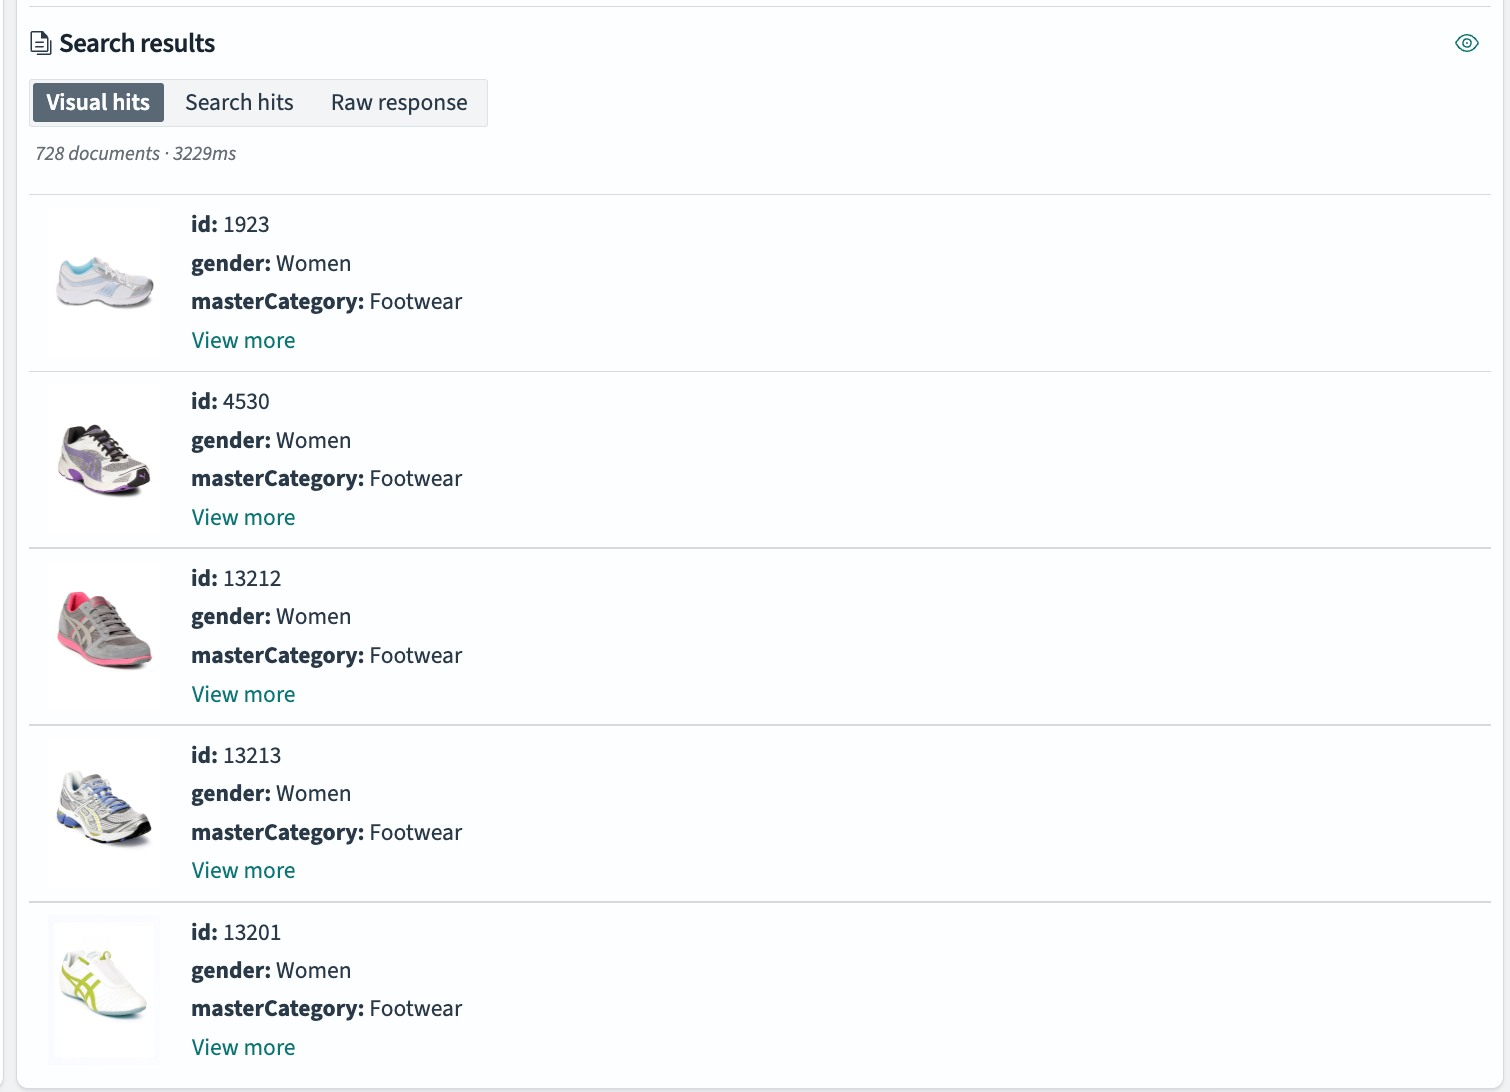
The agent generates optimized query DSL and runs the search, returning women’s running shoes under $100. The following image demonstrates the flow agent’s query generation.

The following image shows the resulting product matches.
Step 3: Tune your agent
Similarly to the previous example, you can test how your agent performs by using different models for query generation.
Next steps
Ready to transform your search experience? Start by testing agentic search in OpenSearch Dashboards, then use the insights you gain to build powerful production applications. For more information and examples, see the following resources:
- Experiment first: Try agentic search on the ML playground with preconfigured agents.
- Plan your implementation: Review the agentic search OpenSearch Dashboards documentation.
- Understand the architecture: Explore the agentic search documentation.
- Learn from examples: Read our previous agentic search blog post.