Introduction
OpenSearch can operate as a single-node or multi-node cluster. Production setup typically requires a multi-node cluster. In this tutorial, you will learn how to setup a multi-node cluster of OpenSearch using Helm and configure OpenSearch Dashboards to access the cluster. This will setup a three-node cluster that has one dedicated master node, one dedicated coordinating node, and one data node that are used for ingesting data. So, let’s start setting up the OpenSearch stack on K8s.
Step 1: Set up Kubernetes
For demo purposes, I am using Docker Desktop for running a local Kubernetes (abbreviated as k8s) cluster. The Helm chart version used for this tutorial for OpenSearch is 1.2.4 and 1.0.6 for OpenSearch Dashboards. You can use anything you prefer, be it minikube, kind, etc. You an also setup Kubernetes clusters in AWS, Google Cloud, Azure or any other cloud provider and set up the context on your local environment. If you don’t have kubectl installed follow the instructions to install. It will help in managing all the deployments in Kubernetes clusters.
This tutorial uses “contexts.” A context is a group of access parameters. Each context contains a Kubernetes cluster, a user, and a namespace. The current context is the cluster that is currently the default for kubectl.
You can check your current context by running :
> kubectl config current-context
To switch to a different context say “docker-desktop”, run the following command and you will be good to go.
> kubectl config set-context docker-desktop
A minimum of 4GiB of memory is required. I would recommend to have 8 GiB of memory available for this setup to avoid any intermittent failures.
Install Helm in your environment for managing charts deployment by following the instructions from the Helm website.
Step 2: Set up values for different nodes
- Copy the
values.yamlfile from the Helm repo. - Copy the contents of the
values.yamlfile the into three different pod configuration files namedmaster.yaml,data.yamlandclient.yamlrespectively. - Open the
master.yamlfile and change the configurations to the below values.
 clusterName: "opensearch-cluster"

 nodeGroup: "master"

 masterService: "opensearch-cluster-master"

 roles:
   master: "true"
   ingest: "false"
   data: "false"
   remote_cluster_client: "false"

replicas: 1- Save the file and close.
- Open the
data.yamlfile and change the following configurations:
 clusterName: "opensearch-cluster"

 nodeGroup: "data"

 masterService: "opensearch-cluster-master"

 roles:
   master: "false"
   ingest: "true"
   data: "true"
   remote_cluster_client: "false"

 replicas: 1
The setup creates 1 data pod replica. Save the file and close.
- Open the
client.yamlfile and change the following configurations:
 clusterName: "opensearch-cluster"

 nodeGroup: "client"

 masterService: "opensearch-cluster-master"

 roles:
   master: "false"
   ingest: "false"
   data: "false"
   remote_cluster_client: "false"

replicas: 1- Save the file and close it.
Step 3: Deploy
- Add the Helm repository
helm repo add opensearch https://opensearch-project.github.io/helm-charts/- Run the
helm installcommand three times once for each custom YAML file.
 helm install opensearch-master opensearch/opensearch -f  usr/data/master.yaml
 helm install opensearch-data opensearch/opensearch -f  usr/data/data.yaml
helm install opensearch-client opensearch/opensearch -f usr/data/client.yaml- Wait for the deployment to complete. Use the command :
kubectl get podsto inspect the progress of the deployment.The output shows READY 1/1 once the deployment succeeds.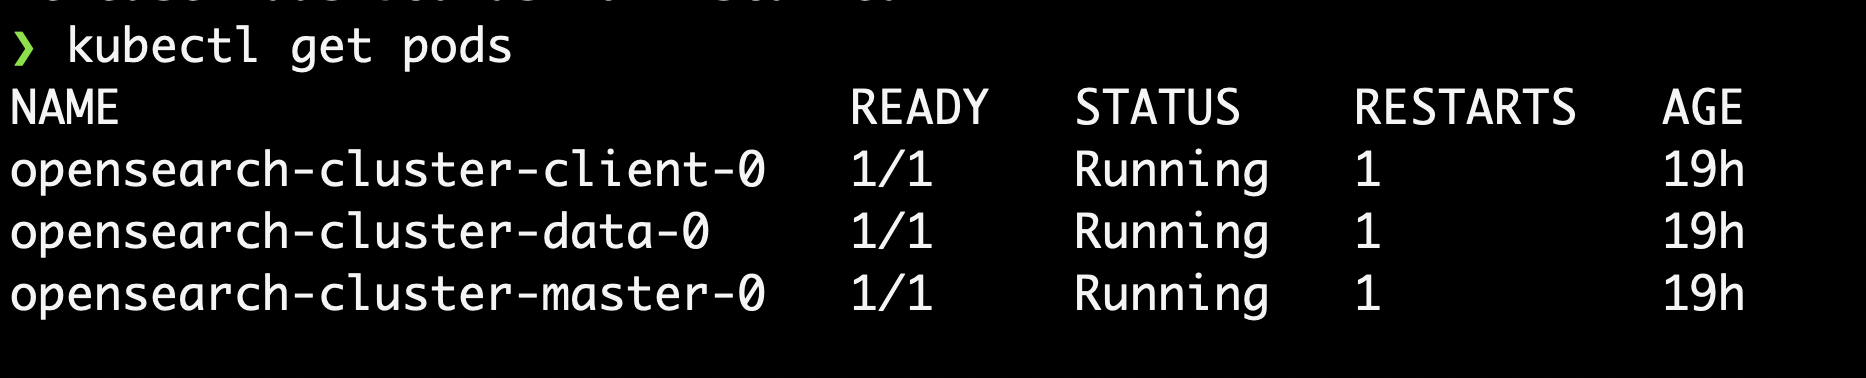
- Install OpenSearch Dashboards with the default configuration by doing a Helm install.
helm install dashboards opensearch/opensearch-dashboards- Repeat step 3 to inspect the deployment for OpenSearch Dashboards.
Step 4: Play with the cluster
- To access the cluster locally use
kubectlto forward it to port 9200 using the below command.
kubectl port-forward opensearch-cluster-master-0 9200
- Open a different tab in the terminal and run the following command to check your cluster is spinning
curl -XGET https://localhost:9200 -u 'admin:admin' --insecure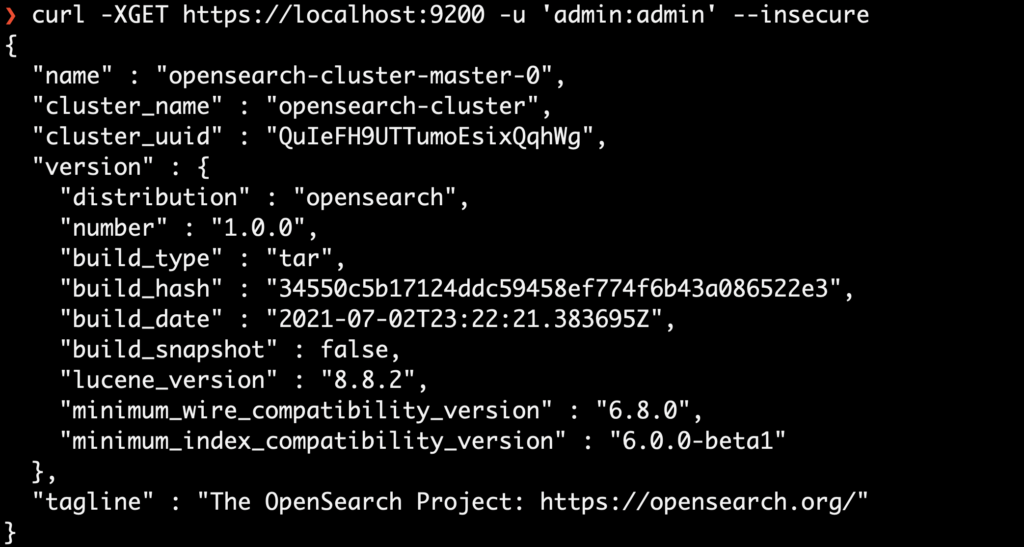
- To access the OpenSearch Dashboards URL locally, forward it to port 5601.
kubectl get pods
After getting the pod name do a port-forward to 5601 by running the following command
kubectl port-forward dashboards-opensearch-dashboards-575ddd7c4b-cc28b 5601Output :

- Visit the url http://localhost:5601/ and use username and password as “admin” to play around with OpenSearch Dashboards
In this tutorial you learned about different tools which are used for managing Kubernetes clusters like Helm, kubectl etc. After completing the tutorial you should be able to have a multi-node cluster up and running on your Kubernetes cluster. You can leverage the different features in the Helm charts to setup your production stacks which can be used for logging, monitoring and for a number of other purposes. One thing to note there might be newer releases in the official Helm charts so syntax may vary from the blog, please refer the repository’s README for more details on that. Happy helming!