In version 2.1, the OpenSearch project introduced Snapshot Management (SM)—a way to automatically take snapshots of your cluster. While previously you had to rely on external management tools like Curator, now you can automatically back up your index data and cluster state through OpenSearch. Just set a schedule to take snapshots every hour or every Sunday at midnight, and sit back while the snapshots are created.
You can even get notifications of the snapshot activities. Plus, if you have large amounts of data coming in, you can manage the lifecycle of the snapshots you store. You can specify a retention policy to keep snapshots from the last 30 days or to keep only the 100 most recent snapshots. In short, SM frees you of menial tasks so you can be more productive.
Snapshots 101
Think of taking snapshots as taking pictures of your cluster.
What is a snapshot
A snapshot is a point-in-time backup of your cluster. You can use it for disaster recovery, migrating data to a new cluster, or preserving a point-in-time view of your data.
What do snapshots store?
A snapshot preserves two things: the cluster data and the cluster state. The cluster data includes OpenSearch index data, such as settings and mappings. The cluster state includes persistent cluster settings and index templates. Preserving the cluster state in a snapshot is optional and can be controlled with the include_global_state parameter.
Why do you need to take snapshots?
Let’s go through the two most common scenarios in which you would need to take snapshots.
Scenario 1: Red Alert! – Your cluster goes red because nodes went down, causing data loss. In this case, you can restore the red indexes from the most recent snapshot.
Scenario 2: Migration – You need to migrate from one cluster to another. In this case, you can restore the indexes on your new cluster from a snapshot.
Scenario 3: Restore to a point-in-time view – You need to revert back to a point-in-time view. You can restore your cluster from a snapshot to go back to a previous state.
Scenario 4: Save costs – You need to save historical data for compliance, but you primarily use only last seven days of data. You can save all previous data in a snapshot and delete it from your cluster to save cost.
Snapshots are incremental
Snapshots only store the changes since the last successful snapshot. The first time you take a snapshot, it contains all the data in the index, so the operation is resource intensive. Each snapshot you take after that contains only the incremental changes in the data, so the operation becomes lightweight.
If you want to learn more about snapshots, take a look at the snapshot documentation. Now let’s dive into SM.
SM in action
Think of SM as having your index periodically take selfies.
How to set up SM
You can set up SM either using the REST API or through OpenSearch Dashboards. Here is the sequence that you should follow.
First, create a repository to hold your snapshots.
Then, create an SM policy. The SM policy describes the following:
- The indexes for which to take snapshots.
- How often and when to take snapshots (for example, every hour or every Sunday at midnight).
- Which snapshots to retain (for example, retain snapshots taken within the last 30 days or retain the last 100 snapshots). This is optional. If you don’t specify a retention schedule, OpenSearch will keep all snapshots.
- How you want to be notified of snapshot events and what snapshot events interest you (creation, deletion, or failure). This is optional.
You need to set the schedule for your automatic snapshots using a cron expression. Let’s dissect the expression 0 8 * * *, which we’ll use in the example below.
| 0 | 8 | * | * | * |
| minute | hour | day of month | month | day of year |
This cron expression means you want to take snapshots at 8:00 AM every day.
Here’s a sample SM policy that puts together all of this information:
POST _plugins/_sm/policies/daily-policy
{
  "description": "Daily snapshot policy",
  "creation": {
    "schedule": {
      "cron": {
        "expression": "0 8 * * *",
        "timezone": "UTC"
      }
    },
    "time_limit": "1h"
  },
  "deletion": {
    "schedule": {
      "cron": {
        "expression": "0 1 * * *",
        "timezone": "America/Los_Angeles"
      }
    },
    "condition": {
      "max_age": "7d",
      "max_count": 21,
      "min_count": 7
    },
    "time_limit": "1h"
  },
  "snapshot_config": {
    "date_format": "yyyy-MM-dd-HH:mm",
    "timezone": "America/Los_Angeles",
    "indices": "*",
    "repository": "s3-repo",
    "ignore_unavailable": "true",
    "include_global_state": "false",
    "partial": "true",
    "metadata": {
      "any_key": "any_value"
    }
  },
  "notification": {
    "channel": {
      "id": "NC3OpoEBzEoHMX183R3f"
    },
    "conditions": {
      "creation": true,
      "deletion": false,
      "failure": false,
      "time_limit_exceeded": false
    }
  }
}
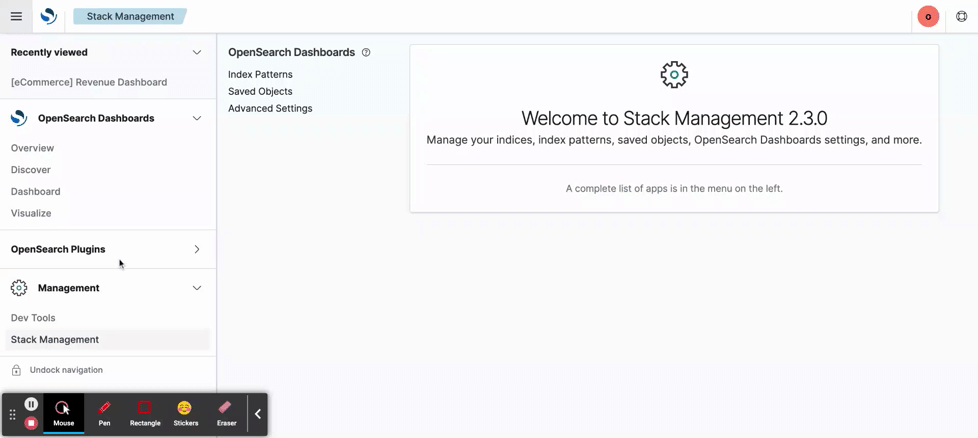
You can also set up your SM policy through OpenSearch Dashboards as follows:
After you create an SM policy, you may start it using the SM Start API and stop it using the SM Stop API. To view the status of the snapshot operations, you can use the SM Explain API.
What if something goes wrong?
Snapshots are retried three times. Even if you don’t set up notifications of failure in the SM policy, you can view the failure message using the SM Explain API or on the policy details page in OpenSearch Dashboards.
How does SM work under the hood?
SM uses a state machine that has two workflows: creation and deletion. These workflows are executed sequentially, so SM does not start a new operation until the previous operation finishes.
The following image shows the creation workflow of the SM state machine.
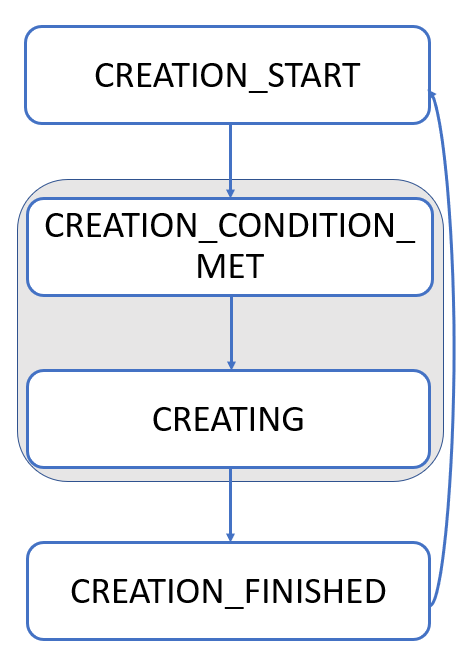
- The creation workflow starts in the
CREATION_STARTstate and continuously checks whether the conditions in the creation schedule are met. - When the conditions are met, the creation workflow switches to the
CREATION_CONDITION_METstate and continues to theCREATINGstate. - The
CREATINGstate calls the Create Snapshot API asynchronously and then waits for snapshot creation to end in theCREATION_FINISHEDstate. - When snapshot creation ends, the creation workflow goes back to the
CREATION_STARTstate, and the cycle continues.
The deletion workflow follows the same pattern, going through the DELETION_START, DELETION_CONDITION_MET, DELETING, and DELETION_FINISHED states.
SM depends on the Job Scheduler plugin to schedule and periodically run a job for each SM policy. The job is lightweight, so the burden of SM depends on how often you take snapshots and the overhead of taking a snapshot itself.
Wrapping it up
SM automates taking snapshots of your cluster and provides useful features like notifications. To learn more about SM, check out the SM documentation section. For more technical details, read the SM meta issue.
If you’re interested in snapshots, consider contributing to the next improvement we’re working on: searchable snapshots.