Managing indexes, aliases, and templates in OpenSearch Dashboards can be difficult using only the API because there are restrictions and relation-binding tasks, such as adding aliases to indexes, simulating an index template by its name, and more. We are pleased to announce that these cluster operations have been significantly simplified with the Index Management UI enhancements in OpenSearch Dashboards v2.5.
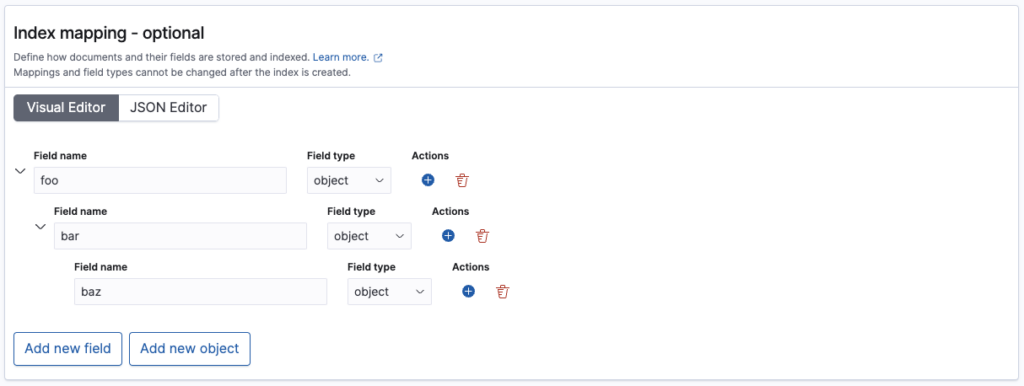
Visual editor for index mappings with nested tree editor
Building index mappings in pure JSON because it has several nested layers and properties. To simplify this task, we now provide a visual editor with editable nested properties, as shown in the following image. You can add properties by choosing the operation buttons and then see what the mappings will look like by switching to the JSON editor.
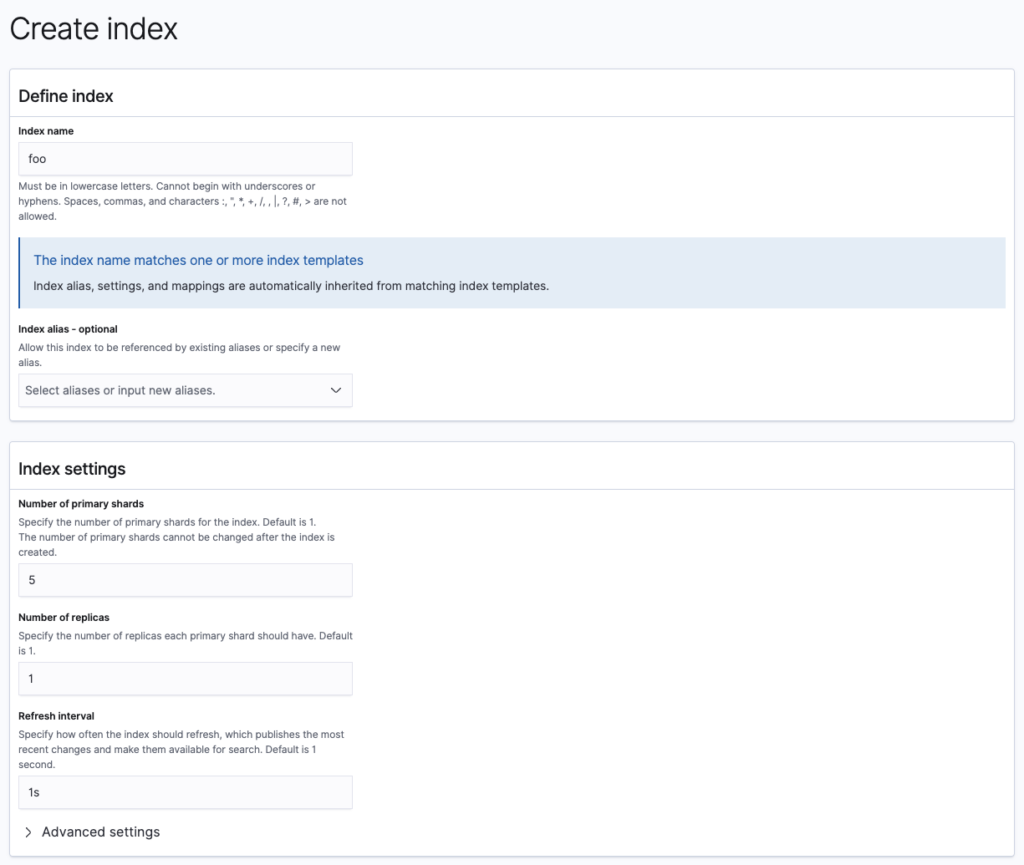
Simulate an index by index name
It is challenging to predict the appearance of the index when taking into account existing templates. To resolve this issue, OpenSearch will attempt to match the index name with the templates whenever you change the index name, as shown in the image below. OpenSearch will merge what users manually input with what the matching template contains, making it a “what you see is what you get” index.
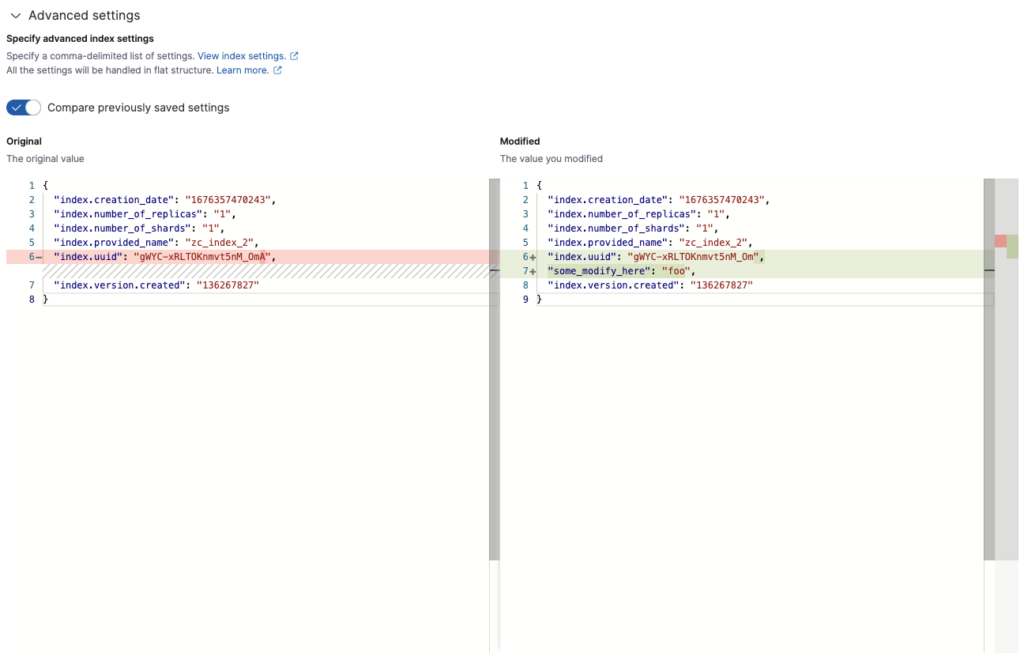
Edit settings by JSON editor and diff mode
The new Index Management UI offers a visual editor and a JSON editor, which you can use if the visual editor does not support all available fields. Additionally, we provided the editor with a diff mode, as shown in the following image, so that you can compare the existing index with the index in the old version and see the changes, preventing errors.
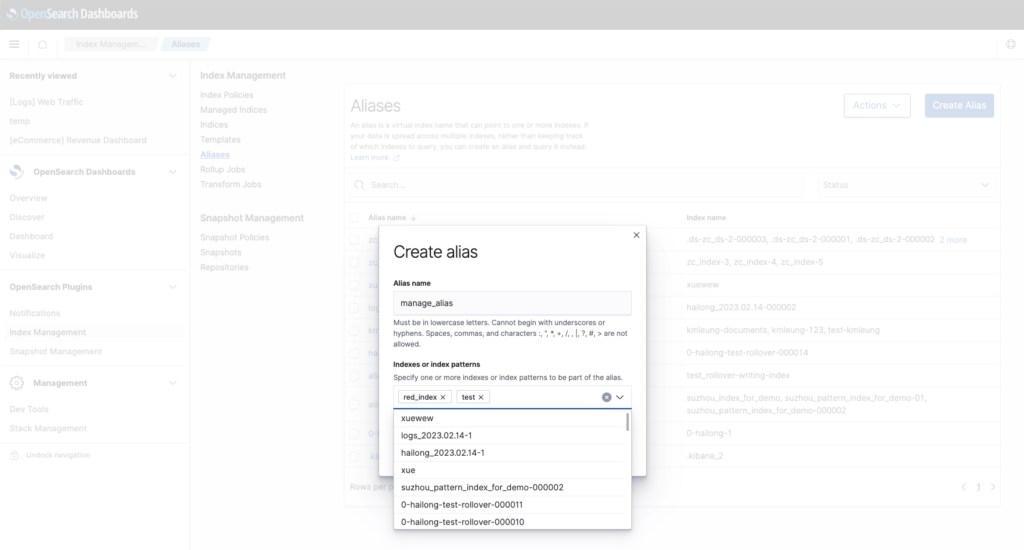
One click to manage index aliases
It is straightforward to find out what aliases an index contains through the API, but it is difficult to determine how many indexes an alias points to through the API. The Aliases page provides you with these results by grouping indexes by alias. With the Index Management UI, it will be easier to attach or detach indexes from an alias, and the alias actions will be automatically generated, eliminating the need for you to build alias actions to add or remove indexes behind an alias and manually enter the indexes, which can lead to mistakes.
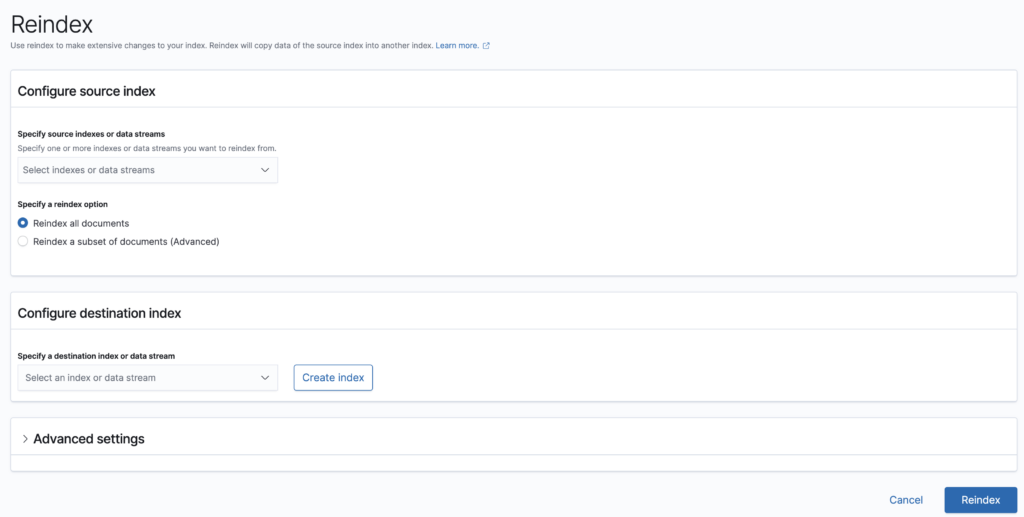
Simplify the reindex operation flow
You can select the source and destination indexes, aliases, or data streams from the dropdown menu, as shown in the following image. Moreover, there is now a destination index creation flow that allows you to import settings and mappings directly from the source.
Shrink index operation
The Shrink index operation is used to reduce the number of primary shards in an existing index and create a new index.
To shrink an index, go to the Indices page, select an index, and choose the Shrink action in the Actions menu. This will take you to the shrink index page, as shown in the following image.

Only one index can be shrunk at once, and the shrink operation does not support data stream indexes. If multiple indexes are selected or if a data stream backing an index is selected in the Indices page, the Shrink option is disabled.
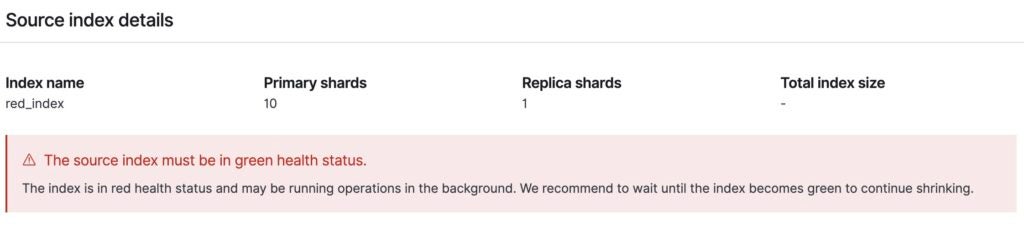
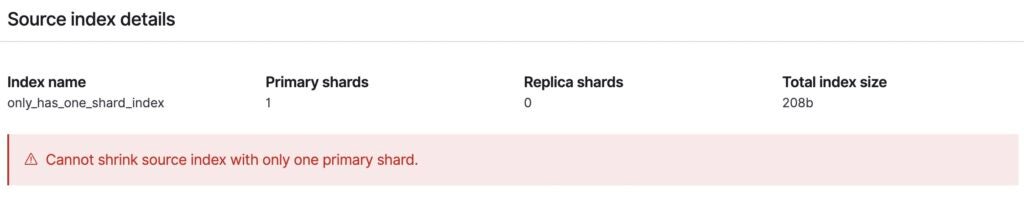
Before shrinking an index, ensure that the index is not in one of the following states:
- The index’s health status is red.
- The index has only one primary shard.
If the index is in either of these states, error messages will be displayed on the Shrink index page, and the Shrink button will be disabled, as shown in the following images.
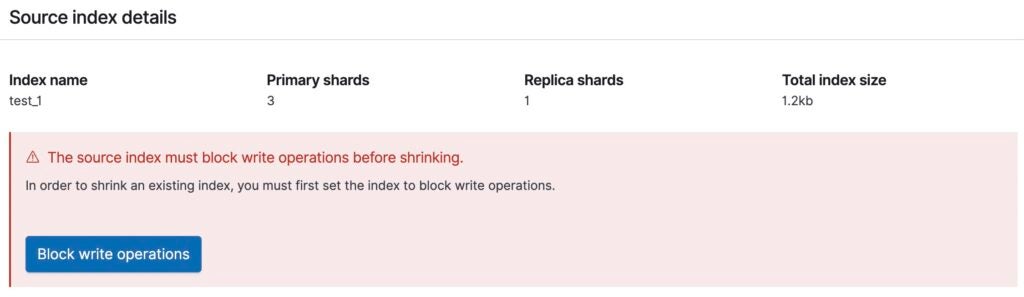
The Shrink index operation requires certain prerequisites to be met. If the source index does not meet the specified conditions, error messages will be displayed on the Shrink index page.
The source index must block write operations, which means that you need to set the index.blocks.write setting in the source index to true. If the source index is not set to block write operations, you can choose the Block write operations button to set the index.blocks.write setting to true, as shown in the following image.
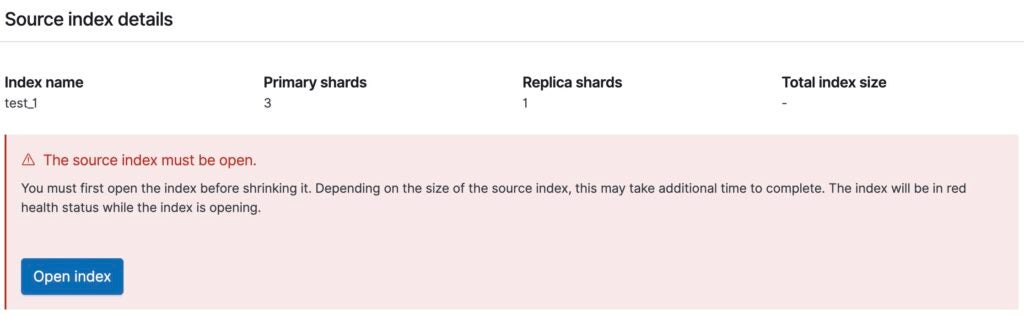
The source index must also be open. If the source index is closed, the shrink operation will fail. You can choose the Open button to open the index, as shown in the following image. This may take additional time to complete, and the index will be in the red health status while opening.
A copy of every shard in the source index must reside on the same node. You can move a copy of every shard to one node manually or use the shard allocation filter to do so. However, this is not required when the cluster has only one data node or if the replica count of the source index is equal to the number of data nodes minus one. In these cases, a copy of every shard in the source index resides on the same node. If a copy of every shard in the source index does not reside on the same node, you can update the index.routing.allocation.require._name setting of the source index to move shards to one node automatically.
You can update this setting on the source index’s detail page, as shown in the following image.
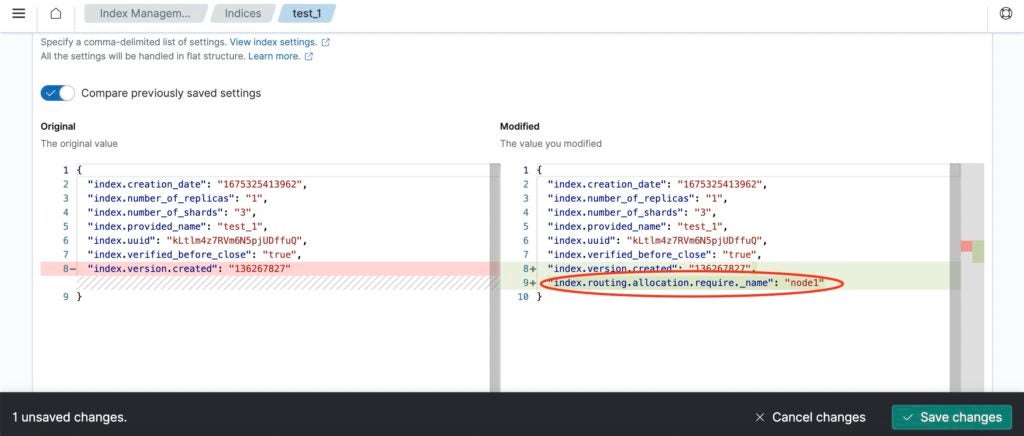
Or you can submit the following request with Dev Tools:
PUT test-1/_settings
{
"index.routing.allocation.require._name":"node1"
}
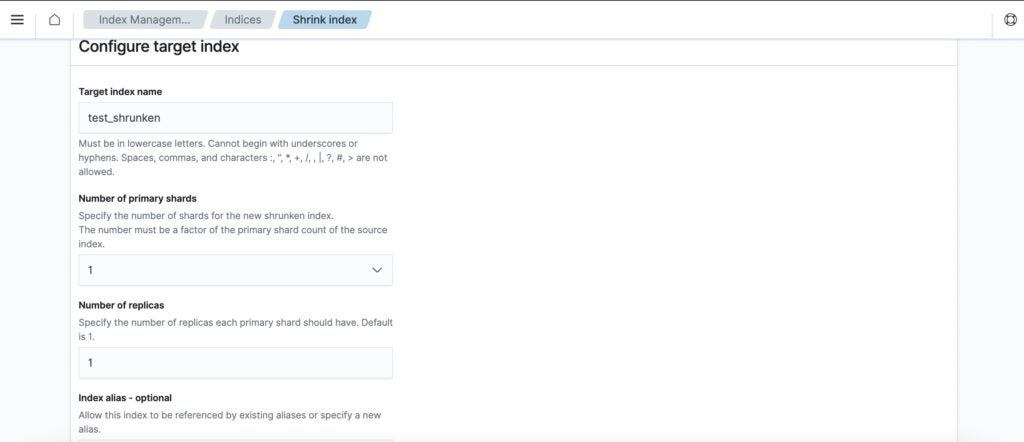
After ensuring that all prerequisites are met, you can complete the input form on the Shrink index page. Specify a name, the primary shard count, and the replica count for the new shrunken index, as shown in the following image. You can also specify new aliases or select existing aliases to attach to the new shrunken index.
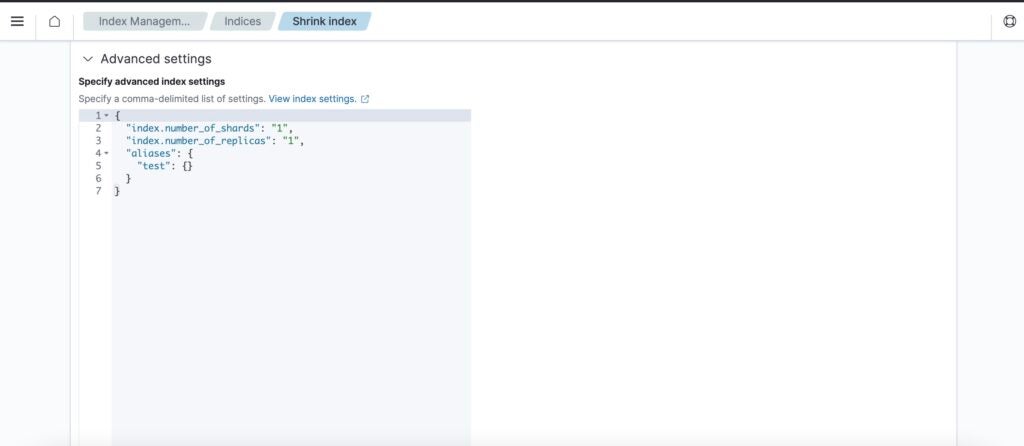
All of the specified settings will also be shown in the JSON editor under the Advanced settings section. You can also specify additional index settings for the new shrunken index in the JSON editor. For example, you can set both index.routing.allocation.require._name and index.blocks.write to null, as shown in the following image. This will clear the allocation requirement and the index write block, which are copied from the source index.
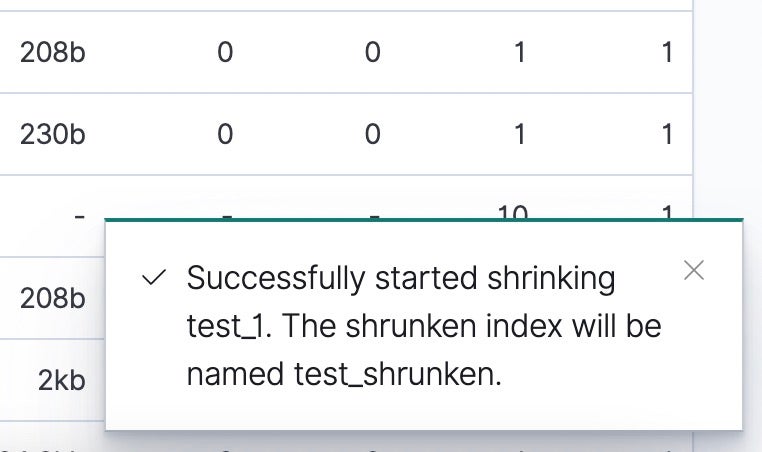
Once you have specified all of the settings for the new shrunken index, choose the Shrink button to trigger the shrink operation. You will see a notification indicating that the shrink operation has started successfully, as shown in the following image.
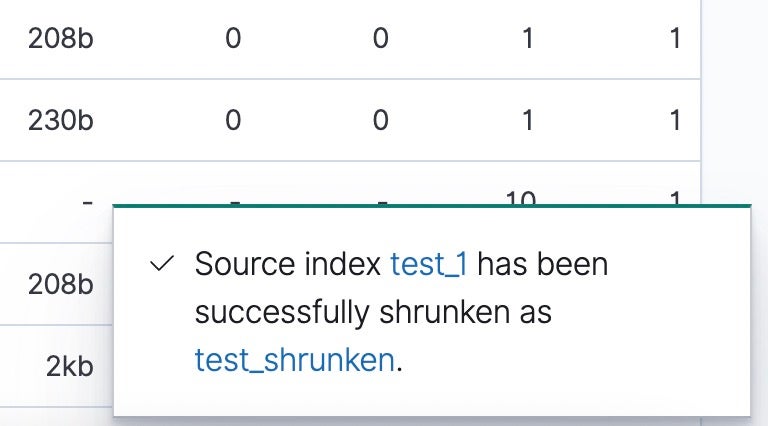
After the shrink operation is complete, which may take anywhere from minutes to hours, a new notification will be displayed stating that the source index has been successfully shrunk, as shown in the following image.
Open and close index operations
You can select multiple indexes, except for the backing indexes of a data stream, to open or close.
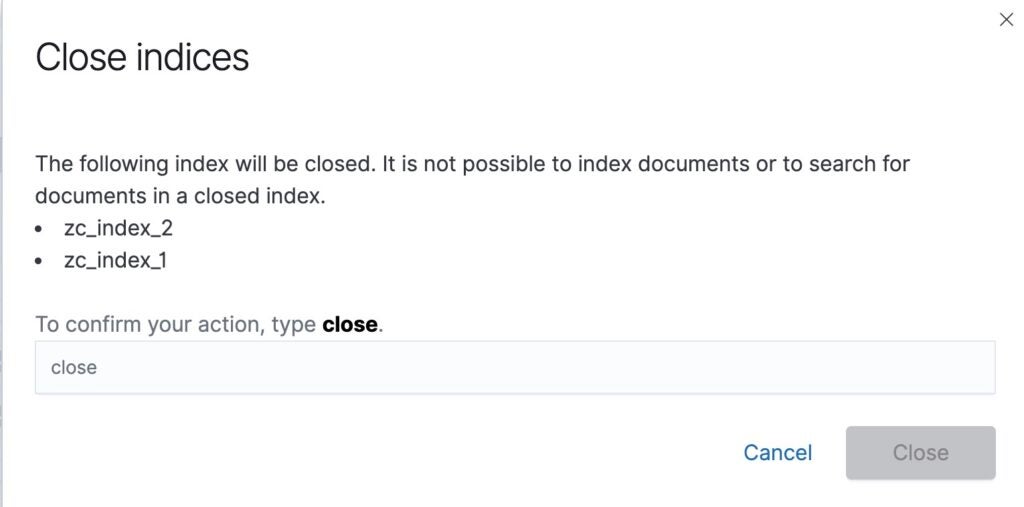
If you no longer need to read or search old indexes but do not want to delete them, you can use the Close operation to close indexes. This will maintain the data by occupying a small amount of overhead on the cluster. Additionally, when you want to add a new analyzer to an existing index, you must close the index, define the analyzer, and then open the index. A closed index is blocked for read and write operations, so you must enter the word “close” to confirm your action, as shown in the following image.
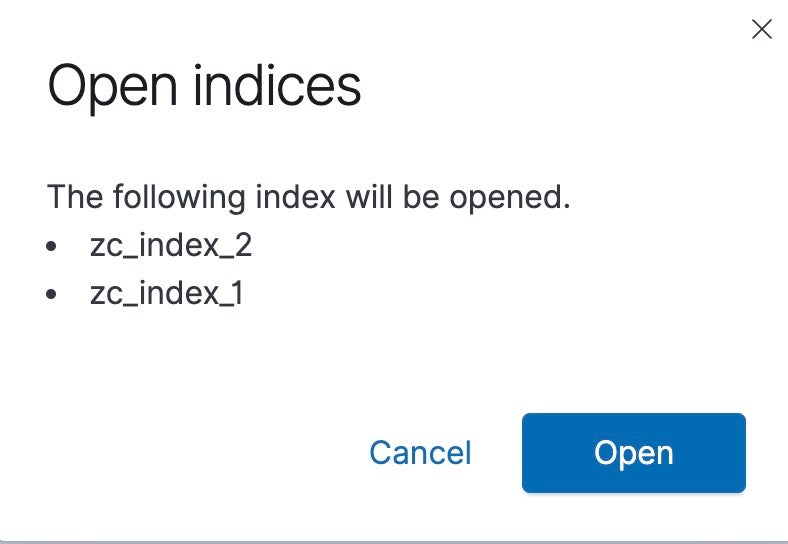
You can select multiple indexes to open, even if some indexes are already open, as shown in the following image.
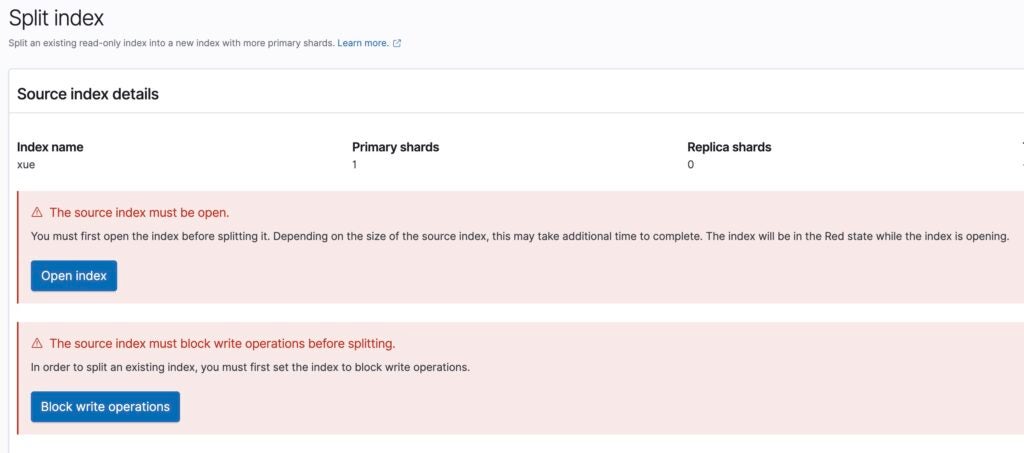
Split index
When you choose to split an index, the status of that index is checked. If the index is not able to be split, actions that you can take to prepare the index for splitting are provided. A list of shard numbers that the index can be split into is also provided so that you do not need to calculate the shard numbers manually. You can then specify the number of replicas and associate the new index with an existing index or use a new alias. You can also use the JSON editor to specify any additional index settings, as shown in the following images.

Next steps
If you want to try the new index management features, you can experiment with them on the OpenSearch playground. We will also be releasing more Index Management UI features for data streams, metrics monitoring, and more. If you have any feedback or suggestions, leave a message on the OpenSearch forum.
References
- OpenSearch 2.5 is live! blog post