Per query and per bucket monitors
Per query monitors are a type of alert monitor that can be used to identify and alert on specific queries that are run against an OpenSearch index; for example, queries that detect and respond to anomalies in specific queries. Per query monitors only trigger one alert at a time.
Per bucket monitors are a type of alert monitor that can be used to identify and alert on specific buckets of data that are created by a query against an OpenSearch index.
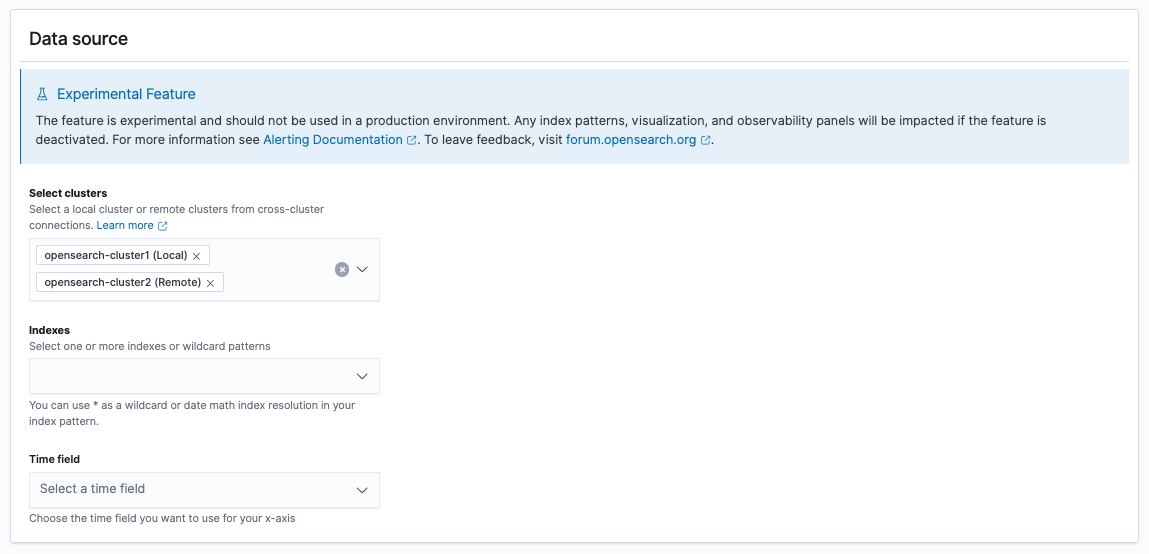
Both monitor types support querying remote indexes using the same cluster-name:index-name pattern used by cross-cluster search or by using OpenSearch Dashboards 2.12 or later.
The following permissions are required in order to create a cross-cluster monitor through the dashboards UI: cluster:admin/opensearch/alerting/remote/indexes/get, indices:admin/resolve/index, cluster:monitor/health, and indices:admin/mappings/get.
Creating a per query or per bucket monitor
To create a per query monitor, follow these steps:
Step 1. Define your query and triggers. You can use any of these methods: visual editor, query editor, or anomaly detector.
-
Visual definition works well for monitors that can be defined as “some value is above or below some threshold for some amount of time.” It also works well for most monitors.
-
Query definition provides flexibility in relation to your query (using OpenSearch query DSL) and how you evaluate the results of that query (Painless scripting).
The following example averages the cpu_usage field:
     {
       "size": 0,
       "query": {
         "match_all": {}
       },
       "aggs": {
         "avg_cpu": {
           "avg": {
             "field": "cpu_usage"
           }
         }
       }
     }
You can also filter query results using {{period_start}} and {{period_end}}:
     {
       "size": 0,
       "query": {
         "bool": {
           "filter": [{
             "range": {
               "timestamp": {
                 "from": "{{period_end}}||-1h",
                 "to": "{{period_end}}",
                 "include_lower": true,
                 "include_upper": true,
                 "format": "epoch_millis",
                 "boost": 1
               }
             }
           }],
           "adjust_pure_negative": true,
           "boost": 1
         }
       },
       "aggregations": {}
     }
“Start” and “end” refer to the interval at which the monitor runs. See Monitor variables.
To define a monitor visually, choose Visual editor. Then choose a source index, a time frame, an aggregation (for example, count() or average()), a data filter (if you want to monitor a subset of your source index), and a group-by field if you want to include an aggregation field in your query. At least one group-by field is required if you’re defining a per bucket monitor.
Visual definition works well for most monitors.
If you use the Security plugin, you can only choose indexes that you have permission to access. For details, see Alerting security.
To use a query, choose Extraction query editor, add your query (using OpenSearch query DSL), and test it using the Run button.
The monitor makes this query to OpenSearch as often as the schedule dictates; check the Query Performance section and make sure you’re comfortable with the performance implications.
Anomaly detection is available only if you are defining a per query monitor.
To use an anomaly detector, choose Anomaly detector and select your Detector.
The anomaly detection option is for pairing with the Anomaly Detection plugin. See Anomaly Detection.
For anomaly detector, choose an appropriate schedule for the monitor based on the detector interval. Otherwise, the alerting monitor might miss reading the results. For example, assume you set the monitor interval and the detector interval as 5 minutes, and you start the detector at 12:00. If an anomaly is detected at 12:05, it might be available at 12:06 because of the delay between writing the anomaly and it being available for queries. The monitor reads the anomaly results between 12:00 and 12:05, so it does not get the anomaly results available at 12:06.
To avoid this issue, make sure the alerting monitor is at least twice the detector interval. When you create a monitor using OpenSearch Dashboards, the anomaly detector plugin generates a default monitor schedule that’s twice the detector interval.
Whenever you update a detector’s interval, make sure to update the associated monitor interval, as the Anomaly Detection plugin does not do this automatically.
Step 2. Choose the frequency to run the monitor, for example, either by time intervals (minutes, hours, days) or on a schedule. If you run it by time interval or on a custom custom cron expression, then you must provide the time zone.
Step 3. Add a trigger to the monitor.