Working with detection rules
The Detection rules window lists all security rules used for detection creation and provides options for filtering the list and viewing details for each rule. Further options allow you to import rules and create new rules by first duplicating a Sigma rule and then modifying it. This section covers navigation of the Rules page and provides descriptions of the actions you can perform.
Viewing and filtering rules
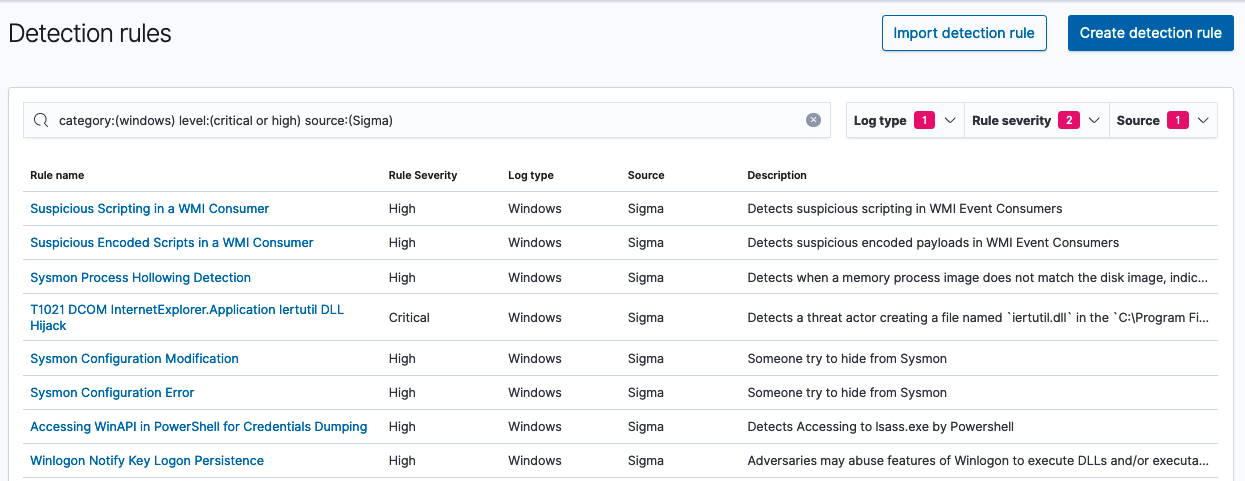
When you open the Detection rules page, all rules are listed in the table. Use the search bar to search for specific rules by entering a full or partial name and pressing Return/Enter on your keyboard. The list is filtered and displays matching results.
Alternatively, you can use the Rule type, Rule severity, and Source dropdown lists to drill down in the alerts and filter for preferred results. You can select multiple options from each list and use all three in combination to narrow results.
Rule details
To see rule details, select the rule in the Rule name column of the list. The rule details pane opens.
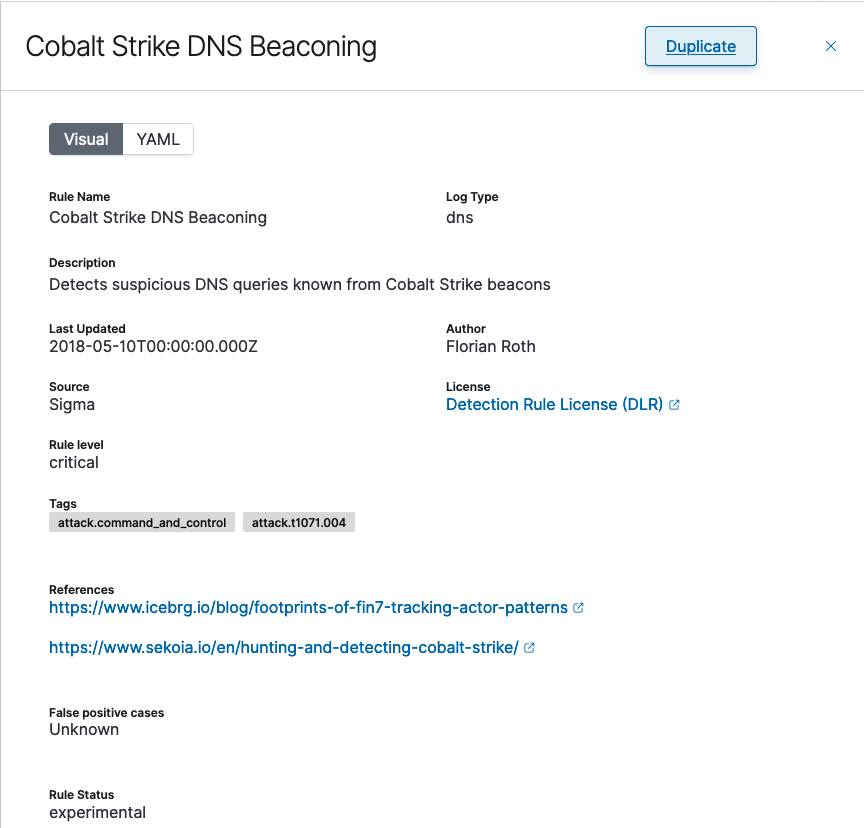
In Visual view, rule details are arranged in fields, and the links are active. Select YAML to display the rule in YAML file format.

- Rule details are formatted as a YAML file according to the Sigma rule specification.
- To copy the rule, select the copy icon in the upper-right corner of the rule. To quickly create a new, customized rule, you can paste the rule into the YAML editor and make any modifications before saving it. See Customizing rules for more information.
Creating detection rules
There are multiple ways to create rules on the Detection rules page. These methods include manually creating a custom rule, importing a rule, and duplicating an existing rule to customize it. The following sections discuss these methods in detail.
Custom rules
The first method of rule creation is to create a custom rule by manually filling in the necessary fields that complete the rule, using either the Visual Editor or the YAML Editor. To do this, select Create detection rule in the uppper-right corner of the screen. The Create detection rule window opens.
If you choose to create the rule manually, you can refer to Sigma’s Rule Creation Guide for more information about the details of each field.
The Visual Editor
When the Create detection rule window opens, the Visual Editor is displayed by default. The required fields in the Visual Editor correspond to the basic fields found in a YAML file formatted as a Sigma rule. The descriptions in these steps mention this correspondence when it might not be immediately obvious.
-
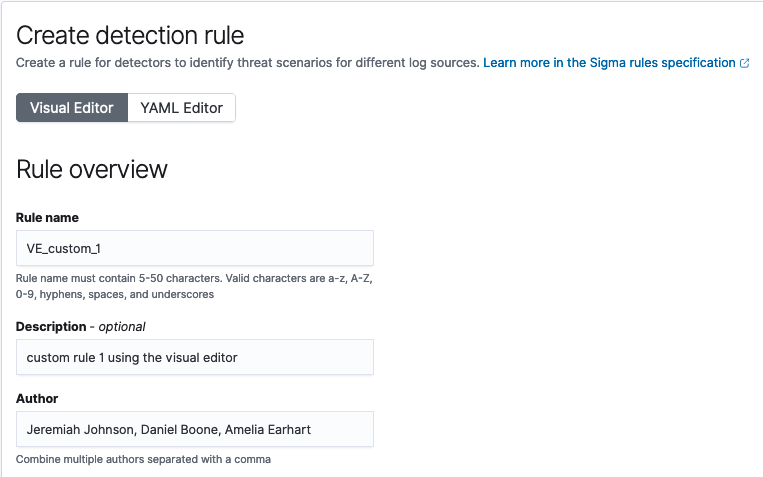
In the Rule overview section, enter a name for the rule, a description (optional), and the author of the rule. The Rule name corresponds to title in a Sigma rule formatted in a YAML file. The following image provides an example of the populated fields.
-
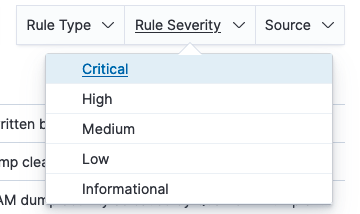
In the Details section, enter the log type for the data source, the rule level, and the rule status. The Log type corresponds to the
logsourcefield (specifically, thelogsource: productfield), while the rule level and rule status correspond tolevelandstatus, respectively. Levels in Sigma rules include informational, low, medium, high, and critical. The following image provides an example.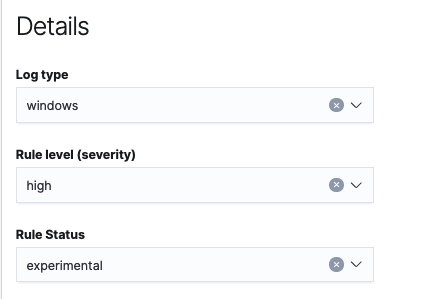
-
In the Detection section, specify key-value pairs to represent the fields and their values in the log source, which will be the target for detection. These key-value pairs define the detection. You can represent key values as either a single value or as a list containing multiple values.
To define a simple key-value pair, first place the cursor on the Selection_1 label and replace it with a selection name that describes the key-value pair. Next, enter a preferred field from the log source as the Key, and then use the Modifier dropdown list to define how the value is handled. The following modifiers are available:
contains– Adds wildcards on either side of the value so that it is matched anywhere in the field.all– In the case of a list, rather than separate values with OR logic, the logic becomes AND and looks for a match with all values.endswith– Indicates that the value is matched when it appears at the end of the field.startswith– Indicates that the value is matched when it appears at the beginning of the field.
After selecting a modifier, select the Value radio button and then enter a value for the key in the text field that follows it.
You can add fields for mapping a second key-value pair by selecting Add map. Follow the previous guidance in this step to map the key-value pair. The following image shows how this definition for two key-value pairs appears in the Create detection rule window.
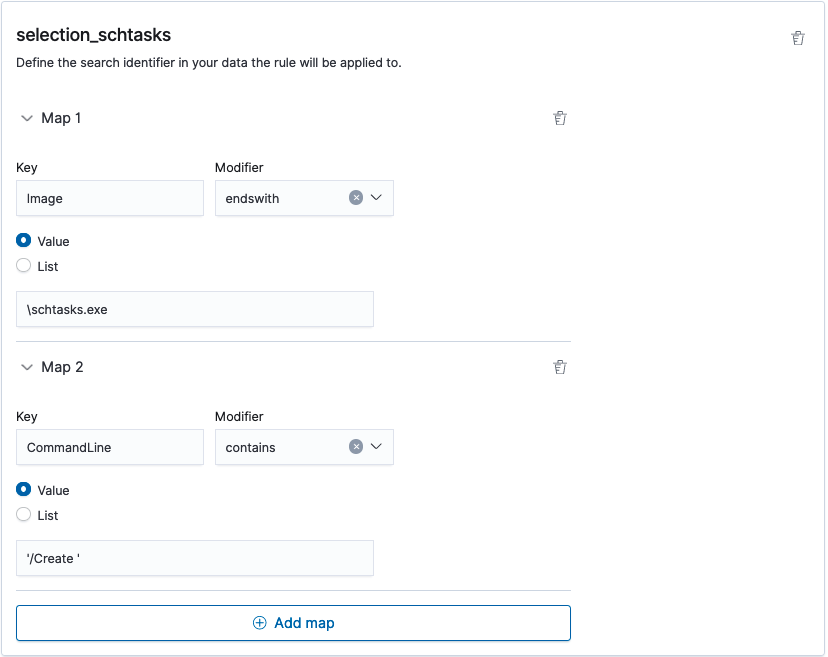
To see how this definition compares to how it would be configured in the YAML file, refer to the following example:
detection:
   selection:
    selection_schtasks:
      Image|endswith: \schtasks.exe
      CommandLine|contains: '/Create '
To add a second selection, use the Add selection bar following the first selection to open another key-value pair mapping. For this selection, values are provided as a list. As described in the first selection, replace the Selection_2 label with a selection name, enter a field name from the log as the key, and select a modifier from the Modifier dropdown list.
Then, to define a key-value pair using a list rather than a single value, select the List radio button. The Upload file button appears and the text box is expanded to accommodate the list.
You can upload an existing list of values in either .csv or .txt format. Select Upload file and follow the prompts to upload a file’s content into the text field. As an alternative, you can manually compose the list directly in the text field. The following image shows how a key-value pair mapping including a list of values appears.
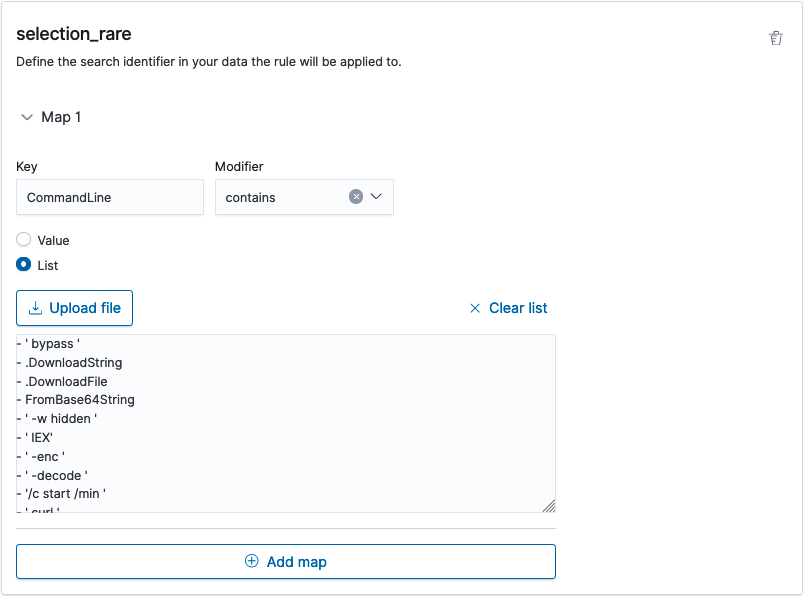
To see how the definition with both of the preceding selections compares to how it would be configured in the YAML file, refer to the following example:
detection: selection: selection_schtasks: Image|endswith: \schtasks.exe CommandLine|contains: '/Create ' selection_rare: CommandLine|contains: - ' bypass ' - .DownloadString - .DownloadFile - FromBase64String - ' -w hidden ' - ' IEX' - ' -enc ' - ' -decode ' - '/c start /min ' - ' curl ' -
In the Condition section, specify the conditions for the selections included in the detection definition. These conditions determine how the defined selections are handled by the detection rule. At least one selection is required. In the case of the preceding example, this means that at least one of the two selections
selection_schtasksandselection_raremust be added in the Conditions section.Select the
+sign beside Select to add the first selection. Select the+sign again to add further selections from the detection definition. Once two selections are present as conditions, the Boolean operator AND appears between them, indicating that both will be used in the detection rule query. You can select the operator’s label to open the operator dropdown list and choose from the optionsAND,OR, andNOT. The following image shows how this option appears.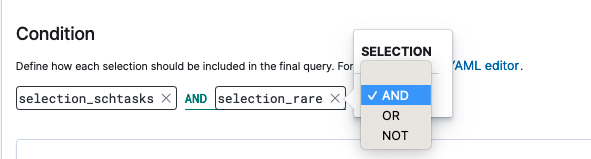
-
Specify optional fields for the detection rule.
- In the Tags section, add tags to associate the detection rule with any attack techniques recorded by a cybersecurity knowledge base such as MITRE ATT&CK. Select Add tag to add multiple tags.
- In the References section, you can add URLs for rule references. Select Add URL to add multiple URLs.
- The False positive cases section provides a space for listing descriptions of false positive conditions that could trigger unwanted alerts for the rule. Select Add false positive to add multiple descriptions.
-
Once the rule is complete and meets your requirements, select Create detection rule in the lower-right corner of the window to save the rule. A rule ID is automatically assigned to the new rule and appears in the list of detection rules.
The YAML Editor
The Create detection rule window also contains the YAML Editor so that you can create a new rule directly in a YAML file format. Select YAML Editor and then enter information for the pre-populated field types. The rule’s id is provided and assigned when the rule is saved. The following example shows the basic elements of a typical rule:
title: RDP Sensitive Settings Changed
logsource:
  product: windows
description: 'Detects changes to RDP terminal service sensitive settings'
detection:
  selection:
    EventType: SetValue
    TargetObject|contains:
      - \services\TermService\Parameters\ServiceDll
      - \Control\Terminal Server\fSingleSessionPerUser
      - \Control\Terminal Server\fDenyTSConnections
      - \Policies\Microsoft\Windows NT\Terminal Services\Shadow
      - \Control\Terminal Server\WinStations\RDP-Tcp\InitialProgram
  condition: selection
level: high
tags:
  - attack.defense_evasion
  - attack.t1112
references:
  - https://blog.menasec.net/2019/02/threat-hunting-rdp-hijacking-via.html
  - https://knowledge.insourcess.com/Supporting_Technologies/Wonderware/Tech_Notes/TN_WW213_How_to_shadow_an_established_RDP_Session_on_Windows_10_Pro
  - https://twitter.com/SagieSec/status/1469001618863624194?t=HRf0eA0W1YYzkTSHb-Ky1A&s=03
  - http://etutorials.org/Microsoft+Products/microsoft+windows+server+2003+terminal+services/Chapter+6+Registry/Registry+Keys+for+Terminal+Services/
falsepositives:
  - Unknown
author:
  - Samir Bousseaden
  - David ANDRE
status: experimental
To assist in rule creation using the YAML Editor, you can refer to Sigma’s Rule Creation Guide and use the descriptions of each field to learn more about defining the rule.
Importing rules
Security Analytics also supports the importing of Sigma rules in YAML format. In the Detection rules window, follow these steps to import a rule.
- To begin, select Import detection rule in the upper-right corner of the page. The Import rule page opens.
- Either drag a YAML-formatted Sigma rule into the window or browse for the file by selecting the link and opening it. The Import a rule window opens and the rule definition fields are automatically populated in both the Visual Editor and YAML Editor.
- Verify or modify the information in the fields.
- After you confirm that the information for the rule is accurate, select Create detection rule in the lower-right corner of the window. A new rule is created and appears in the list of detection rules.
Customizing rules
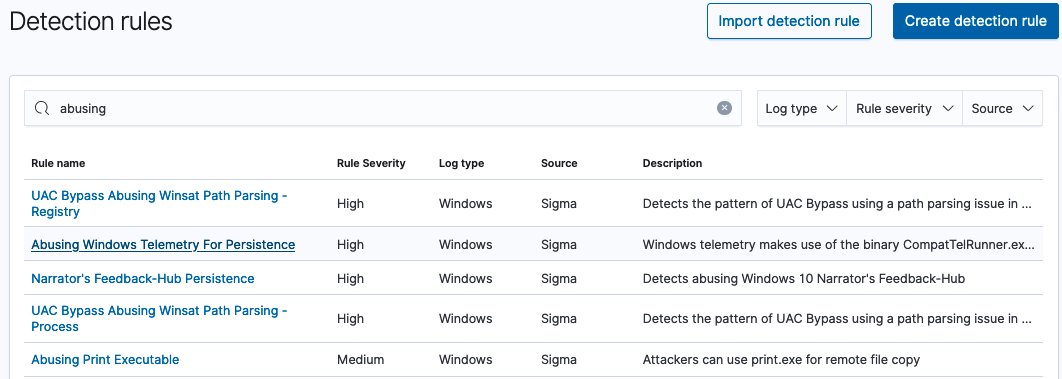
Another option for creating a new detection rule is duplicating a Sigma rule and then modifying it to create a custom rule. First search for or filter rules in the Rule name list to locate the rule you want to duplicate. The following image shows the list filtered with a keyword.
-
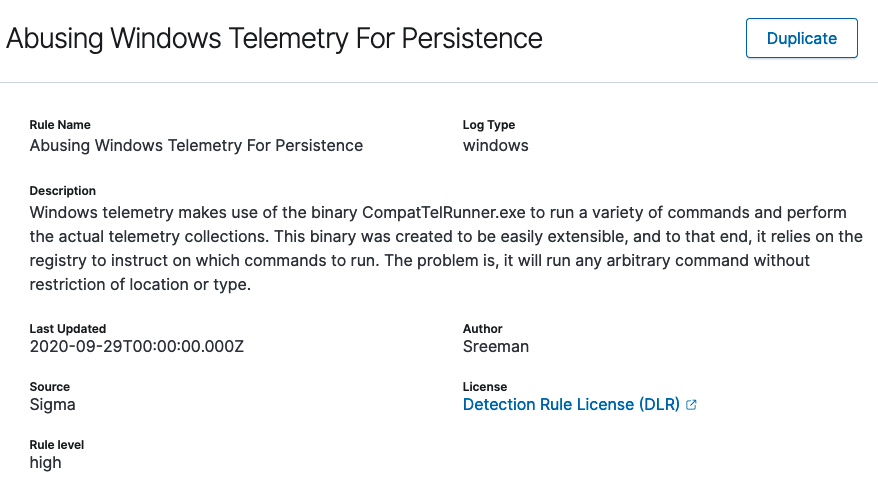
To begin, select the rule in the Rule name column. The rule details are displayed.
-
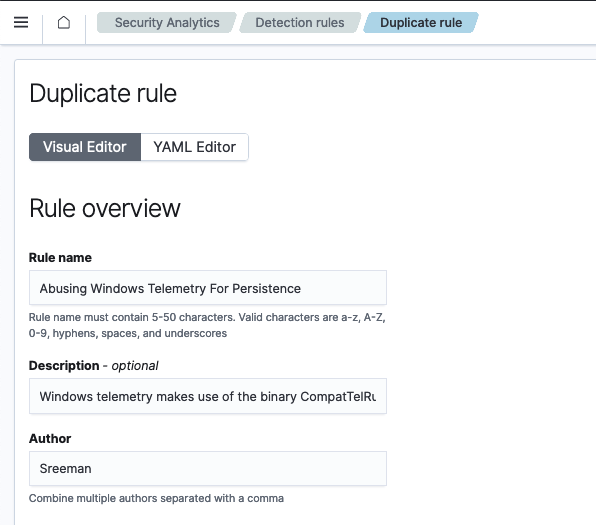
Select the Duplicate button in the upper-right corner of the pane. The Duplicate rule window opens in Visual Editor view and all of the fields are automatically populated with the rule’s details. Details are also populated in YAML Editor view.
- In either Visual Editor view or YAML Editor view, modify any of the fields to customize the rule.
-
After performing any modifications to the rule, select Create detection rule in the lower-right corner of the window. A new, customized rule is created. It appears in the list of rules on the main page of the Detection rules window.

You cannot modify the Sigma rule itself. The original Sigma rule always remains in the system. Its duplicate, after modification, becomes the custom rule that is added to the list of rules.